Are your Andis clippers not cutting?
Andis is a popular hair clipper brand, and for good reason.
They produce powerful clippers.
But at times, problems can occur and they don’t perform as well as they could.
In this article, we will go over how to uncover and solve any problems that lead to your Andis clippers and trimmer not cutting.
(Some of the problems overlap with loud Andis clippers, so if you can’t find the solution in this guide check out our other article on how to fix loud Andis clippers.)
With that said, let’s get into it.
Andis Clippers Not Cutting
A key reason why your Andis clippers won’t cut could be:
- The Blades/clippers are dirty
- The blades need oiling
- Dull blades
- T-liner Blades aren’t close and have weak tension
Bonus tricks you can do to increase cutting performance:
- Zero gapping trimmer/clipper
- Tightening blade lever
Now, let’s get into the fixes.
Why are my Andis Clippers Not Cutting?
It’s all about cleaning.
If you don’t clean your clippers the right way, they’ll never be able to cut well.
Take a look at your clippers. Do you see:
- Hair sticking out
- Slight rust
- A build up of dirt
If that’s the case, then they most likely need cleaning as all of these issues can cause serious performance problems.
When it comes to cleaning, there are 3 types:
- One take cleaning
- Active cleaning (blades on)
- In-depth cleaning (blades off)
Active cleaning is when you clean your clippers after every haircut (this makes one-time cleaning easier in the future).
You should start to add both to your routine if you want your clippers to work at their best.
Active cleaning
Especially if you are a barber, you should be cleaning/disinfecting after every haircut.
It keeps your blades well-sanitized and lubricated, which maximizes their performance.
For this, you only need one product: a cooling, disinfectant spray.
Below are some of the best disinfectant sprays at their lowest prices.
Andis Cool Care Best OVERALL
Clippercide Spray DEEP CLEANER
H-42 Barber Spray Best Solution Based spray
Hold each one at an arm’s length away from your clipper and spray down your blades before you carry on with your cuts.
This video shows you how simple the process is:
You don’t have to be a barber to use an all-in-one spray. If you use your clippers for your own hair, you can use this spray for in-depth cleaning.
I go through this next.
In-Depth Blade Cleaning
While active cleaning is great to quickly clean your clippers, they don’t remove the micro-hairs trapped just behind the blade teeth.
For this task, you’ll need a cleaning solution.
They deeply clean your blades and remove the trapped micro hairs. You can visibly see this happen while you use your clippers.
These are some of the best cleaning solutions, which are specifically made for clippers.
I would suggest you partner the “Andis Cool Care Spray” with the “Cool Care Blade Solution”.
Use both to maximize the cleanliness of your clippers.
Step 1: Spray Down
Follow the steps above and use the Andis Cool Care to clean and sterilize your hair clippers quickly.
Step 2:
Once you’ve sprayed down your blades with the Andis Cool Care, you can start using the blade solution.
Partially fill the lid of the blade solution tub with the blade care formula (enough to cover both blades as I previously told you at the start of this article.)
Step 3:
Now just as we did with the rubbing alcohol, place your blades in the blade care solution and turn your hair clippers on.
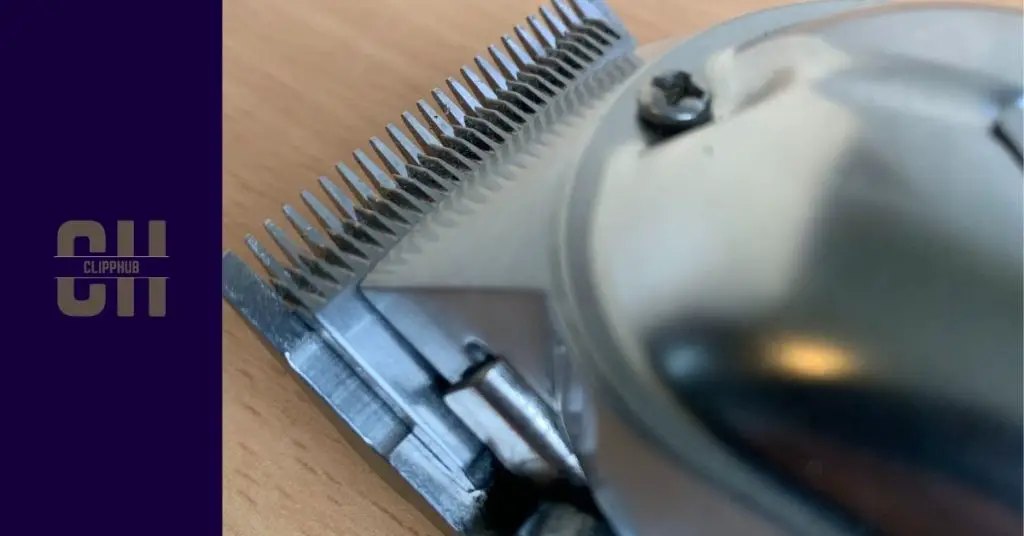
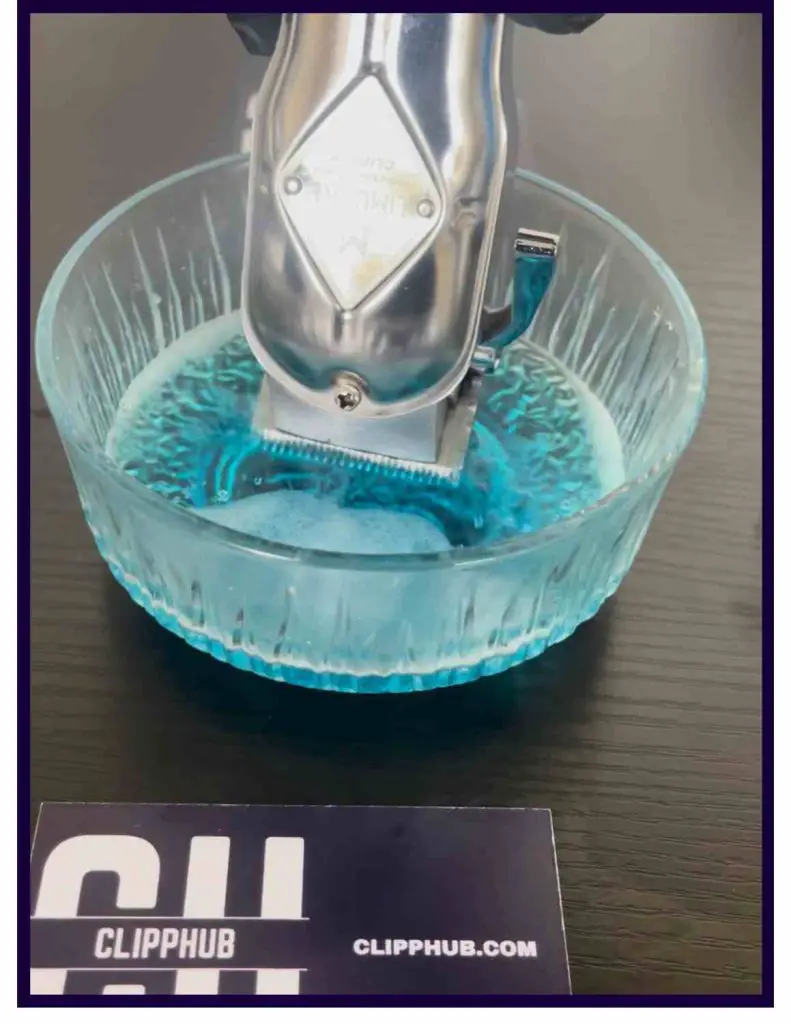
Allow your clippers to run in the solution for 10-20 seconds and watch the micro hairs leave your clipper’s teeth.
If hair is still trapped, try grabbing a toothpick and slowly trying to scrap the hairs out from the cutting blade teeth.
Step 4:
After you are satisfied with how clean your blades are, take out your clippers and wipe away any excess blade care solution.
Now take the blade care solution and place it in a container and dispose of it.
In-Depth Cleaning (Blade Off)
If you really want to solve the root of all your problems problems, this is the most important type of cleaning.
Without you even realizing, the inside of your clippers could look like this:
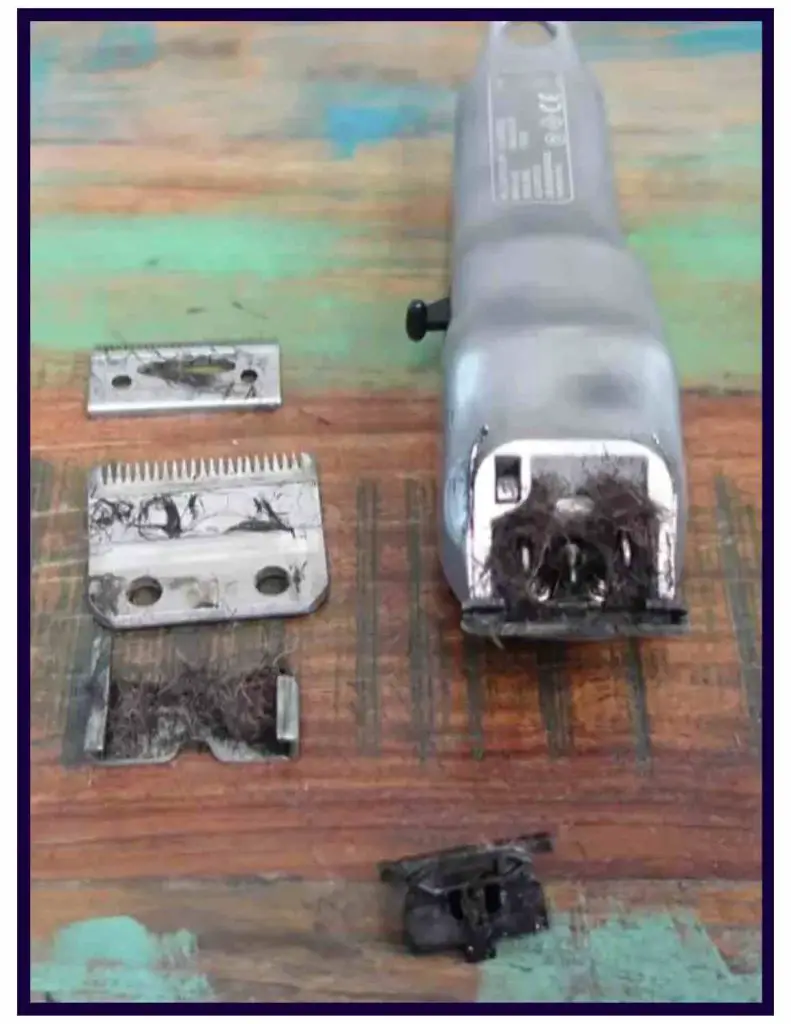
Therefore, you need to get inside and clean them deeply.
When the interior of your clippers is clean, your clippers’ overall function is just so much better.
When you remove your blades, give them a check too.
Your blades could be rusted and need cleaning.
But to really get into in-depth cleaning, I cover everything in my how-to-clean-a-clipper guide.
After cleaning your clippers, oil them.
If you don’t oil your clippers or haven’t oiled them in a long time, then don’t be surprised if your Andis Clippers don’t cut.
Oil reduces the friction between the blades allowing them to glide past each other and cut better as a result.
If you use your clippers more frequently like a barber, you should oil your clippers every 3-4 uses
Hair clipper oil doesn’t just oil. It can clean too.
Hair clipper oil is a very light oil. It gets in and out of your clipper blades without leaving behind any residue or odour.
But on its way out, it also picks up micro hairs or hair stuck in difficult-to-reach places. It almost acts as a passive cleaner.
If you consistently oil your clippers, hair trapped in your teeth can be swept away without you knowing.
However, you should still thoroughly oil your blades and don’t forget to deep clean them too.
Oil your clippers consistently enough and your Andis clippers should start cutting better (especially if you haven’t previously oiled them.)
But how do you oil hair clippers?
I outline the process below:
Time needed: 1 minute
The simple steps to blade longevity.
- Step 1
Turn off your hair clippers
- Step 2
Place 3 drops of oil across the front cutting row of your hair clipper
- Step 3
Place a drop of oil on either side of your hair clippers
(A wahl clipper was used for this photo but the same process applies for Andis clippers too.)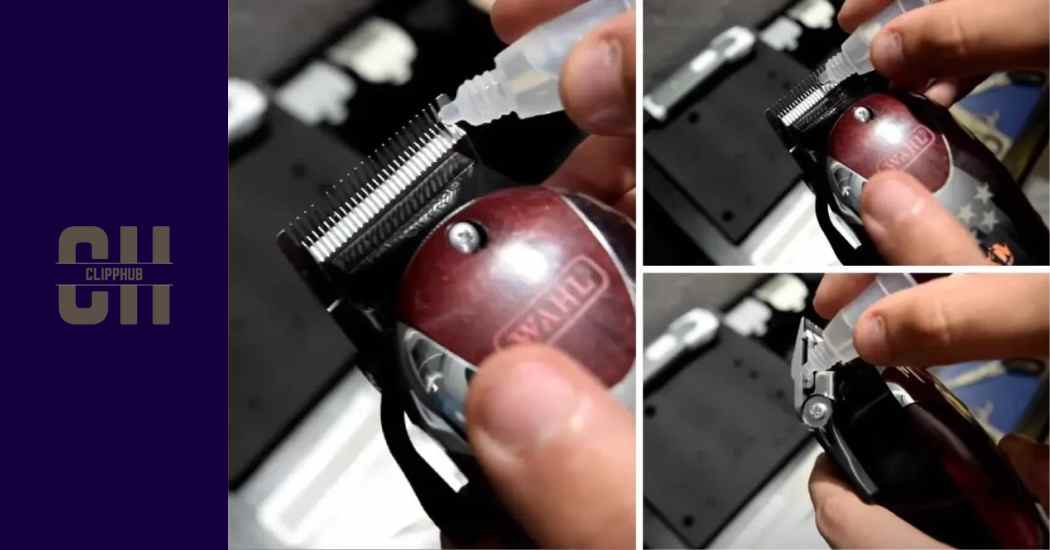
- Step 4
Turn on your hair clippers and let your hair clippers run for 15 seconds, allowing the oil to work around the blades.
- Step 5
Turn your hair clippers off and turn them upside down.
- Step 6
Wipe off any excess oil that drops off the blade with a cloth.
Further on in this article, I’ll show you how sharpening + zero gapping your clippers can bring your clippers back to their best cutting performance!
But let’s first go over how you get your t-liner cutting well too!
Andis T-outliner Trimmer Not Cutting
The T-outliner is a popular choice for clippers.
But at times, this clipper too can have some issues when it doesn’t cut.
The fix below involves adjusting the cutting blade – this is almost like ‘zero gapping your hair clippers’.
Andis T Outliner Not Cutting
Remove the entire blade from your T-outliners – both the cutting blade and guard blade together.
Step 2:
Slightly unscrew the two screws holding the cutting blade to the guard blade
Unscrew to the point where you can now start to slightly move the cutting blade
Step 3:
Move the cutting blade (the smaller blade) up towards the top of the guard blade as close as you can, without overlapping, or setting the cutting blade higher than the guard blade.
If you set the cutting blade any higher, it will cut you, so you just want it to be as close as possible.
Step 4
Tighten the screws once more.
However as you tighten the blades, make sure the cutting blade doesn’t go up to the guard blade in the process.
It must stay straight and behind the guard blade.
Run your fingers across the cutting edge to make sure of this.
It should be smooth and you should only feel the guard blade.
Step 5
Now attach the whole blade back onto your T-outliner trimmer body.
Step 6
Now, set the tension on the clippers to make sure there is enough pressure against the cutting blade.
Find the tension screw on the T outliner:
You want to twist this screw clockwise until you can see a half-moon shape at the tension point.
Once you see this, you can be assured your clippers are set right.
(Be careful as you twist the tension screw, so it doesn’t offset the cutting blade).
If you want the visual process to these steps, this video below can add context.
Andis Masters Won’t Cut
Another reason your Andis clippers aren’t cutting could be due to your blades being blunt.
Blunt clippers pull hair. That would be your #1 sign that they need sharpening.
Again, if you don’t clean and oil your clippers they will blunt, but if it gets to the point where your blades are:
- Damaged/ chipped
- Rusted
- Missing teeth
Then at this point, you shouldn’t even oil your clippers, you should be looking to replace your blades or your clippers as a whole.
Sharpening them would only make the problems worse and I doubt your clippers would come out performing better.
But if your clipper’s blade doesn’t have any of these problems, you should definitely sharpen it. If you have a lever-based clipper like the Andis Masters, here’s an article you can follow to sharpen your clippers:
How to Sharpen Clipper Blades With a Stone (Step-By-Step)
But if you have a detachable blade clipper check out this article:
How To Sharpen Andis Clipper Blades At Home (Step-By-Step)
Now, if you have a lever-based clipper, you can take this one step further and zero gap your newly sharpened blades! This can truly get your clippers cutting.
For this process, all you will need is a screwdriver.
Step 1
Slightly loosen the two screws on the back of the guard blade
Half a turn is all you need, enough to make the guard blade movable.
Step 2
Make sure your taper lever is closed
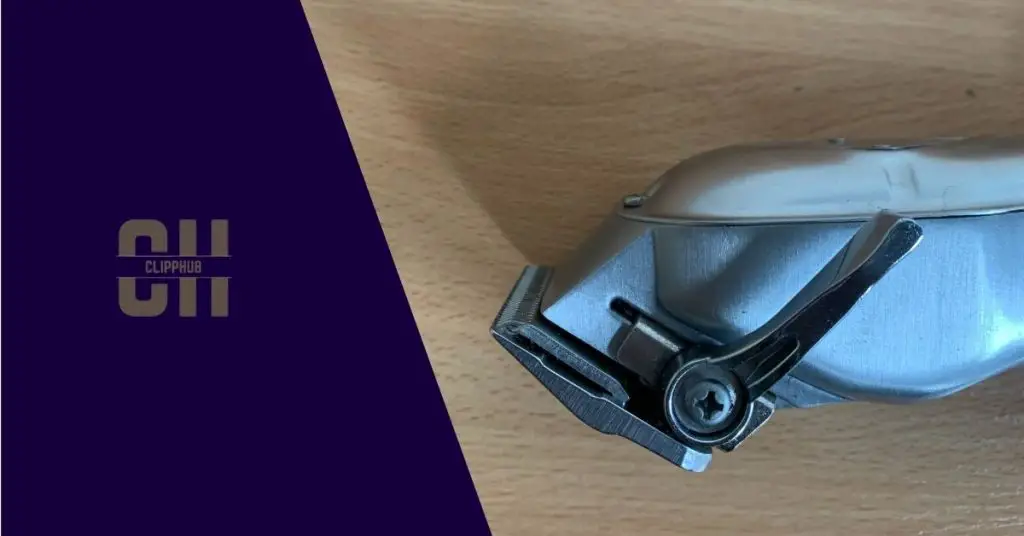
This puts the cutting blade as close to the guard blade as possible.
Step 3
Once again, you are looking to line up the back blade and the front blade.
Now move the guard blade so it lines up with the cutting blade
Once again, without the cutting blade overlapping.
Step 4
Now to check it’s all lined up, you can either use or eyes or press both blades down on a mirror.
Step 5:
Once both blades are set, tighten the back screws.
Look down at the machine one last time to check both blades are straight
If it didn’t straight, loosen the blade and make sure everything is straight.
Now your clippers should be zero-gapped and cut a lot better.
This video demonstrates the process:
Bonus
You may not need to do this step, but it is something you could look into.
This is loosening the taper lever.
Now if you’ve zero-gapped your Andis Master, and the cutting blade doesn’t go over the guard blade when the lever is closed, you don’t have to do this step as the problem isn’t with the lever.
However, if you notice your taper lever is:
- very stiff
- Struggles to close fully (i.e. the cutting blade doesn’t reach the end of the guard blade no matter how much you push the guard blade down)
Loosening up the taper lever can definitely help with these problems.
Step 1
Unscrew and remove the guard blade and cutting blade completely by unscrewing the back blades.
Step 2
Around the pivot, there are 4 screws, you want to slightly, and I mean very slightly unscrew them.
This should loosen the lever. Test out the lever and see if it’s less stiff.
If so, that’s the problem solved.
Step 3
Now you can place the guard blade and cutting blade back on your clippers and you can zero gap them from here.
Andis Clipper Not Cutting
The video below shows the visual process:
Conclusion
In the article, we went over fixes for when your Andis clippers are not cutting.
Some of the possible problems could be:
- The blades/clippers are dirty
- The blades need oiling
- Dull blades
In this article, we covered each problem and their possible fixes.
If you found this article helpful, please check out other articles on this topic, such as how to fix Wahl Clippers not cutting.


