Hair Clippers Not Cutting (The complete Guide)
Hair clippers not cutting can be stressful.
When they can’t perform it can put us in a tight position.
In this article, we will go over the main reasons as to why your clippers won’t cut…
We’ll go over the simple steps you can put in place to resolve the matter and what you can do to prevent the problem in the future.
So with that said, take a look at the table of contents, and let’s begin.
Why are my clippers not cutting my hair?
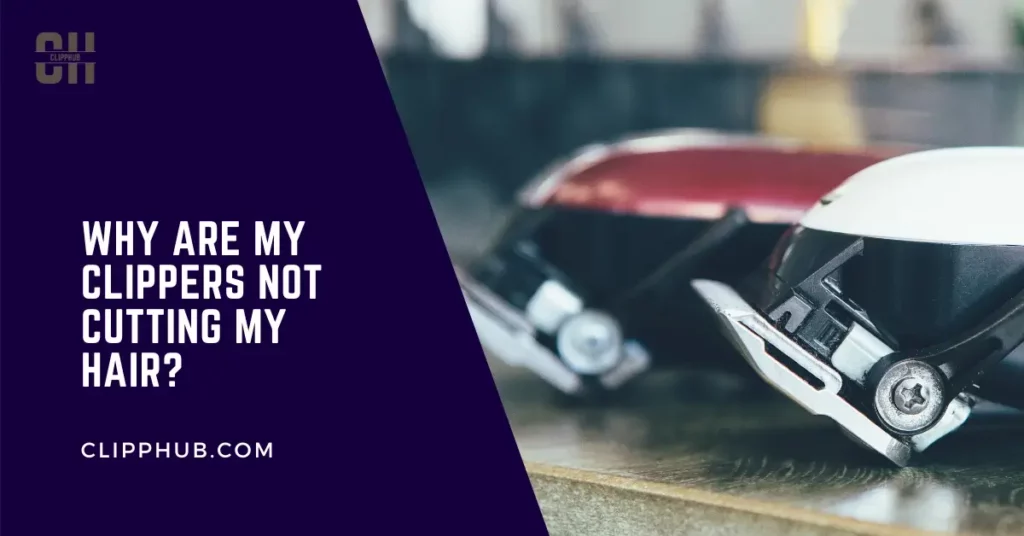
Hair Clipper Not Cutting
There are multiple reasons why your hair clippers aren’t cutting. Hair clippers not cutting could be down to:
- Clogged blades / damaged teeth
- Incorrect blade tension and alignment
- Motor/power problems
- Dull blades
These reasons can be fixed and some extra things such as zero gapping can be done to improve cutting performance. (We’ll talk more about this later.)
But to best resolve the problem, you need to know how each one affects your blades.
Brand-new clippers not cutting
But, before troubleshooting your clippers, make sure you are past your warranty date.
If you have a brand-new clipper from a brand like wahl you may be eligible for a free fix/ refund.
Just be aware of this as If you are in your warranty date, attempting to fix could void you of a free replacement/ refund or service.
Always contact Wahl and read the specific manual of your clipper to make sure all is in order before attempting any fixes.
If all is well, you may carry on.
Let’s get into the major factors.
Hair Clippers Not Cutting Well
Let’s go into depth into the reasons why your hair clipper’s not cutting well.
Clogged blades
If the edges of your hair clippers are clogged with hair or debris, they may not be able to cut effectively.
Try cleaning the blades using a brush or a small tool to remove any clogs.
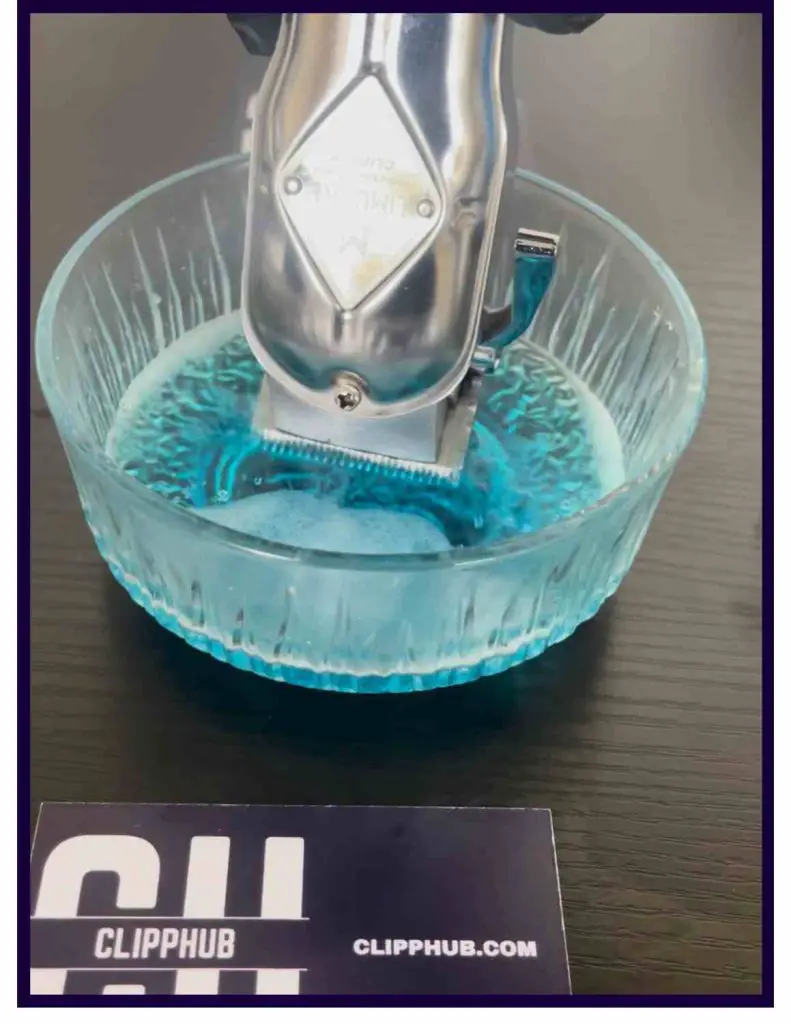
You can also do them in blade wash to easily remove some hairs trapped in between the teeth.
We go through this in this guide:

Clean Clippers With Alcohol (The Ultimate Guide)
But another factor that can be a major concern would be damage to your blade teeth, especially in the cutting blade (the smaller blade).
Damage could be:
- Chipping
- Missing teeth
- Rust on blade teeth
If you have any of these then it’s not surprising why your clippers aren’t cutting.
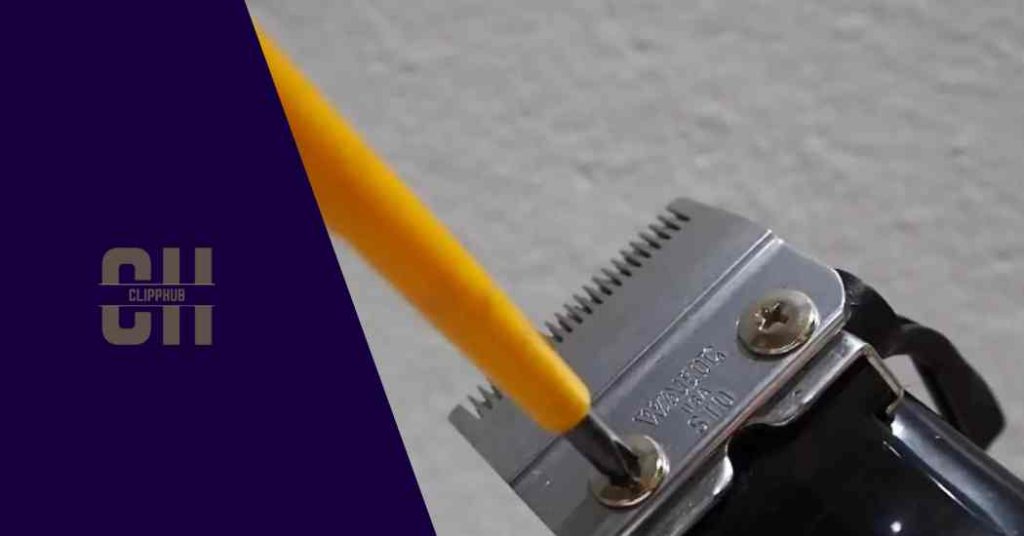
You can simply look to see if your blades are missing teeth but to check for chipping on your blades do this:
If the damage on your teeth is bad, they just will not cut no matter what you do, at this point you’ll have to invest in getting new blades.
The same can be said if you have rust on your blade teeth.
Some rust stating can be cleaned off, leaving sharper metal behind to cut hair.
But if the rusting is all over the blade teeth and you have to scrub hard to remove it, again you’re better of replacing the blades altogether. Even if you do take off the rust, you may have chipped or damaged the blade further in the process!
Now, if none of these apply to you then we can focus on another cause…
Incorrect blade adjustment
When your blades aren’t set right, it can cause the blades to not cut properly.
Along with this, the tension within your blades can be wrong or incorrect leading them to shake and also cut horribly.
Always make sure your cutting blade is always straight and parallel to the top cutting rail blade.
They shouldn’t also be able to easily glide past each other without too much friction.

With lever-based clippers, you can align and zero-gap them so they can cut better, you cant do this with detachable blades. (We do this later).
Low battery/power output
If your hair clippers are battery-powered, a low battery can cause them to not work properly. Make sure that the battery is fully charged or replaced it if necessary.
If you have wire or plugged-in clippers, check the cord and make sure there aren’t any breakages and cuts in the wire.
If you own a pair of cordless clippers then the power output on your blades may not be good enough.
That can be solved by working with the power screw.
This is directly linked to the motor too.
Motor problems
If the motor of your hair clippers is not functioning properly, it can cause the blades not to cut effectively.
There are different types of motors: rotary, magnetic, pivot
Each can come with its own problems but all follow the same premise.
But ultimately no matter how much you adjust the power screw, if your motor is worn out, there’s not much more you can do other than replace your clippers. (We’ll go over this later too.)
Dull Blades
If the blades of your hair clippers are dull they won’t be able to cut through your hair effectively.
If you notice major hair pulling from your hair clippers, you should look to get them sharpened.
This can be don’t professionally or at home depending on how comfortable you are with your clippers.
Now that we know the problems, and have a couple of quick fixes, we’ll go through the major problems, step by step.
Let’s get into it!
How To Fix Hair Clippers That Won’t Cut
Getting the problems above solved can save you from buying a new pair of clippers.
Some fixes are simple and some are a little complicated. But don’t worry, I will still guide you through the process below
Let’s get your clippers back to their best.
Straight to business, let’s clean those clippers!
Honestly, when was the last time you really cleaned your clippers, if yours struggling to remember, that’s why your blades are struggling t cut!
This is a quick cleaning method on how to remove micro hair from your blades at home. These hairs easily get in between your clipper’s teeth stopping them from cutting as effectively.
You can do this without removing your blades.
Allow your clippers to run for 10-20 seconds or until most hair and debris have left your clippers.
This method can give your clippers a good clean, however, the reason your clippers can be more internal.
You can practice this method simply with some vinegar.
For this cleaning process you will need:
- A brush
- Toothpick
- Plastic tub
- Cloth
- Hair clipper oil
Step 1: Unscrew
detach hair clippers. ( keep screws and bolts in a safe place they will be needed later).
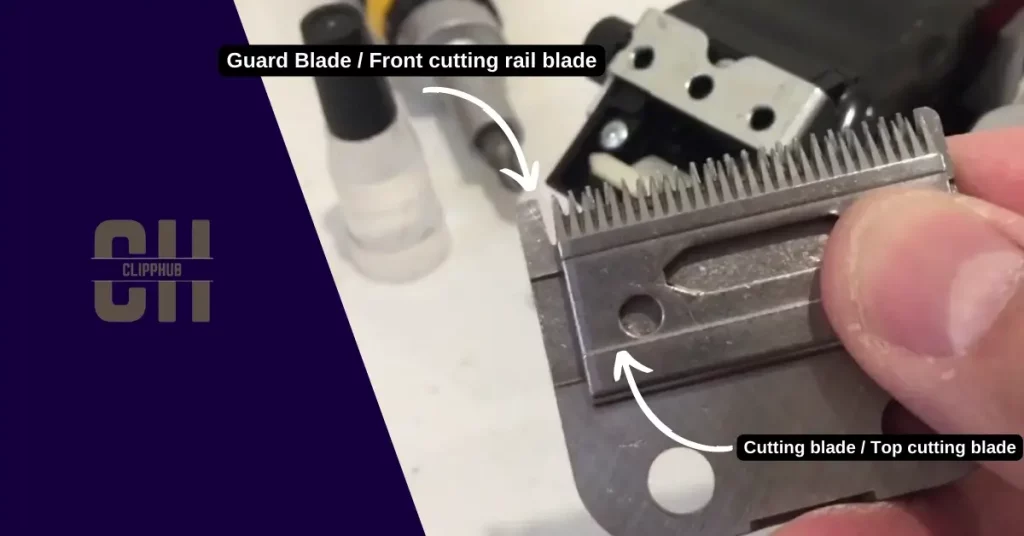
You will notice two blades, the first blade is the front cutting rail blade remove that first. Then you will be met with the top cutting blade, remove this next.
Step 2: Place
Take both blades and place them in a plastic tub.
Step 3: Vinegar
Pour the correct vinegar/alcohol into a flat plastic tub.
It should be enough to cover both the teeth of the top cutting blade and the front rail blade.
Step 3: Clean
Let them sit in the vinegar for 1-2 minutes to allow the vinegar to get underneath the dirt on your blades.
After this time has passed remove your blades from the solution and solution and pat them down with a cloth.
If you notice any extra hidden dirt on your blades using a cloth, dip it into vinegar again for a few more minutes then scrub down with or cloth or soft brush.
Now quickly run your blades underneath the water and dry them thoroughly.
Although they may be stainless steel blades, you still don’t want any moisture to remain on your blades.
Afterward, let them sit and dry off.
Step 4: Inside
If your clippers do look like this:
Using a hard bristle brush, get to cleaning inside your hair clippers.
Use a toothpick or a hard bristle brush to get inside your clippers and pick out all of the clogged dirt and hair.
These bits must be removed.
It has to be a manual process, do not put water or vinegar inside your clippers!
Step 7: Re-attach
Once both your blades and your clipper are clean, you can re-attach your blades back onto your clippers.
Put your clipper blades back onto the setter.
Then palace your front rail blade on top making sure the holes for both line screws line up
Now, individually put your screws back into the hole gap, and using your screwdriver, screw your blades back together but not fully as you have to make sure the alignment is correct.
Step 8: Align
Make sure the top cutting blade is straight and in line with the front cutting rail blade
Move the front cutting rail to make these adjustments, not the top cutting blade.
When all aligned, Screw your blades firmly back together.
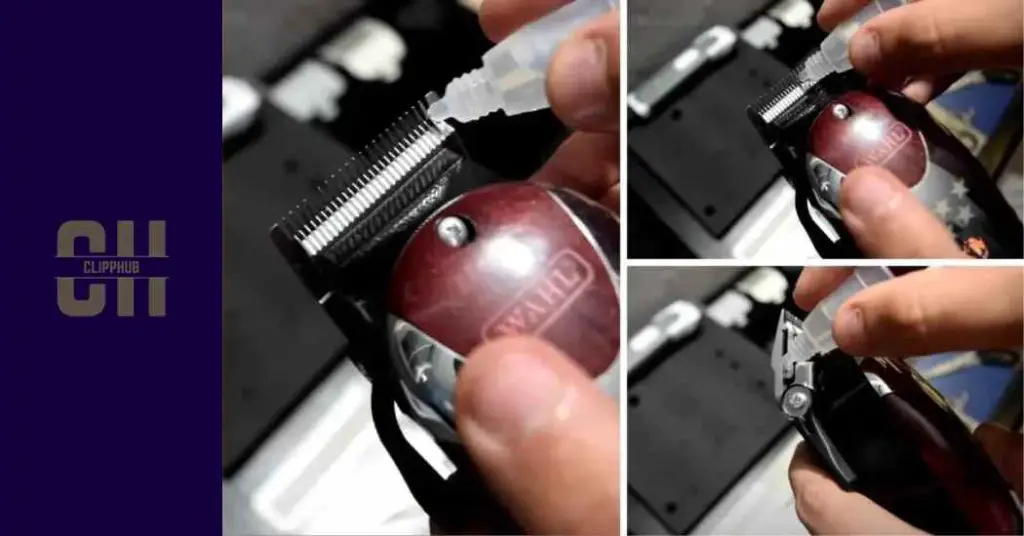
Step 9: Oil
Once your blades are put back together, use hair clipper oil. Apply oil to your blades in the areas shown below:
Once done turn your clippers on and work the oil into blades by opening and closing the lever for 20 seconds.
Afterward, wipe away any excess oil.
Your clippers should now be cleaned and good to go. try them now and see how they cut.
If you don’t cut well, maybe the problem is your alignment and tension, I talk about this next.
Fix Incorrectly blade and tension
Before we align, we must find the best tension for your clippers.
Here’s how to do so:
First, you need to check if your hair clipper blades have the right tension.
Step 1
Turn off your clippers
Step 2
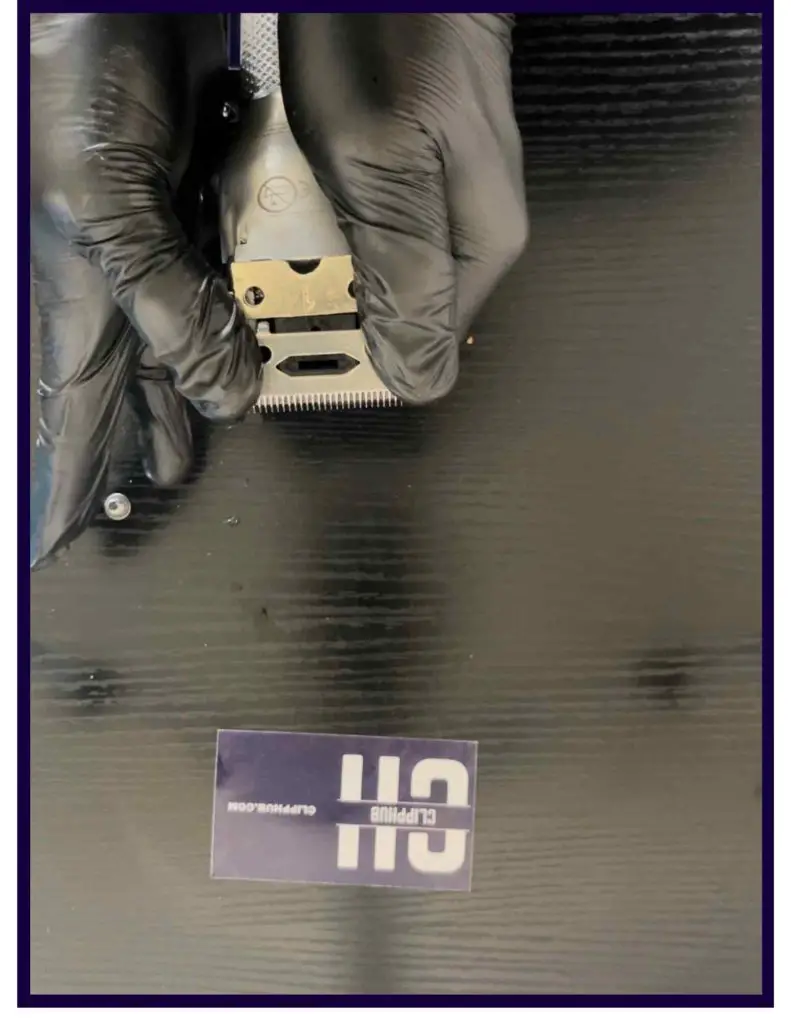
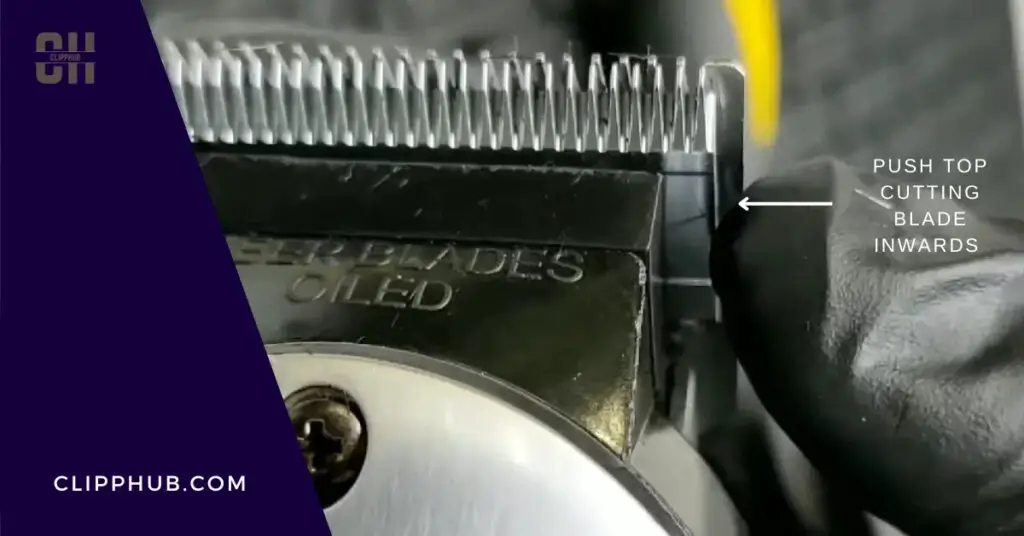
Find the top cutting blade on your clippers – (the blade you visibly see move ad the hair clipper is on)
Step 3
Using your index finger push the side of the cutting blade inward with relative force. (do this once or twice from either side). Do not do it too much as you could miss-align the blades.
The blade should easily slide across without too much friction or movement. If
If you have a hard time pushing across, the tension is too much but if it’s too easy and your blade visibly moves then it’s too loose.
If is a problem, you need to find your tension so that when you align, you know were to finish off.
How To Fix Hair Clipper Tension
Set the tension on your blades
Step 1: Screws
Find the screws on the back of your hair clipper.
Step 2: Find out
After your test depending on the problem, you need to figure out whether you’re going to tighten or loosen the tension in your blades.
If your blades need tightening, turn the screws clockwise if they need slight losing turn them anticlockwise.
Do this very slowly on both screws and do the tension test as you screw.
When you feel the tension is right, stop.
Now unscrew the blade slightly so you have wiggle room for the back cutting rail to align the blades.

How to Align your hair clippers with tension
Quickly align your clippers with the tension applied.
Step 1: Asses
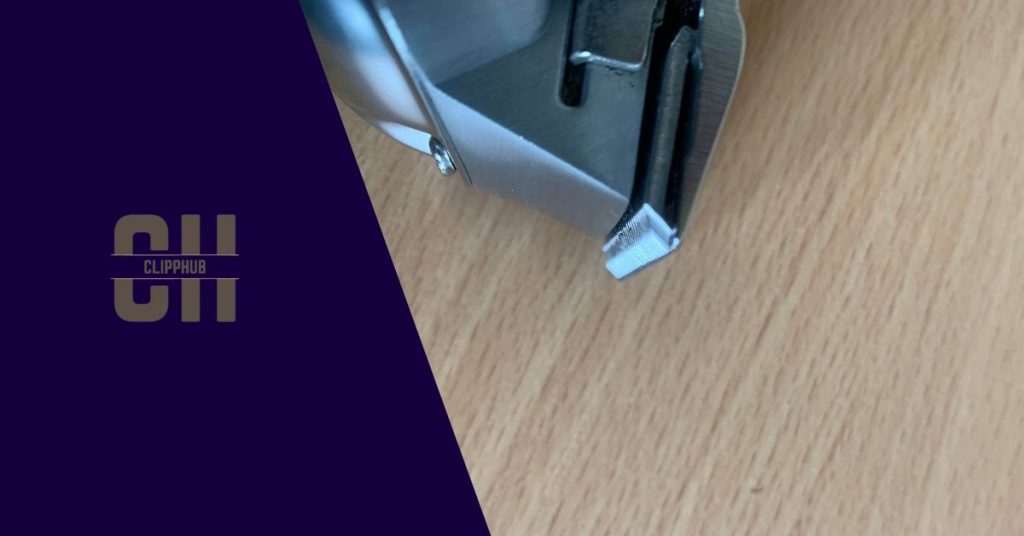
Go to eye level with your blade teeth
Step 2: Close the blades
Close the clipper lever and make sure both blades are straight.
Step 3: Correct Gap
Check to make sure there is a slight gap between both blades, if there isn’t move the front cutting blade up or down until the is, about a width of a credit card.
This video illustrates how to set the right gap – watch from 2:25 – 4 then come back to the steps last steps.
Step 4: Align correctly
This, now that your clippers should have the right tension to go with perfectly straight and aligned hair clippers.
Step 5: Align back to the tension point
Now your blades are aligned, you can set them back to the tension point you found earlier by screwing everything back to the right point as the video showed and I explained.
Try your clippers and see how they cut.
If they still don’t cut it may be a power issue.
Clipper blades moving but not cutting
To fix this, we will be working with the power on the side of your clippers.
It dictates how close your blades get to your motor.
The closer your blades are to your motor the faster they can move and the better they cut.
Your clipper becomes more powerful!
This method works best for magnetic motor clippers so check to see if you have a side power screw, if not, you have a different motor.
Not to worry it just means this problem may not apply to you and you can try the other troubleshooting steps.
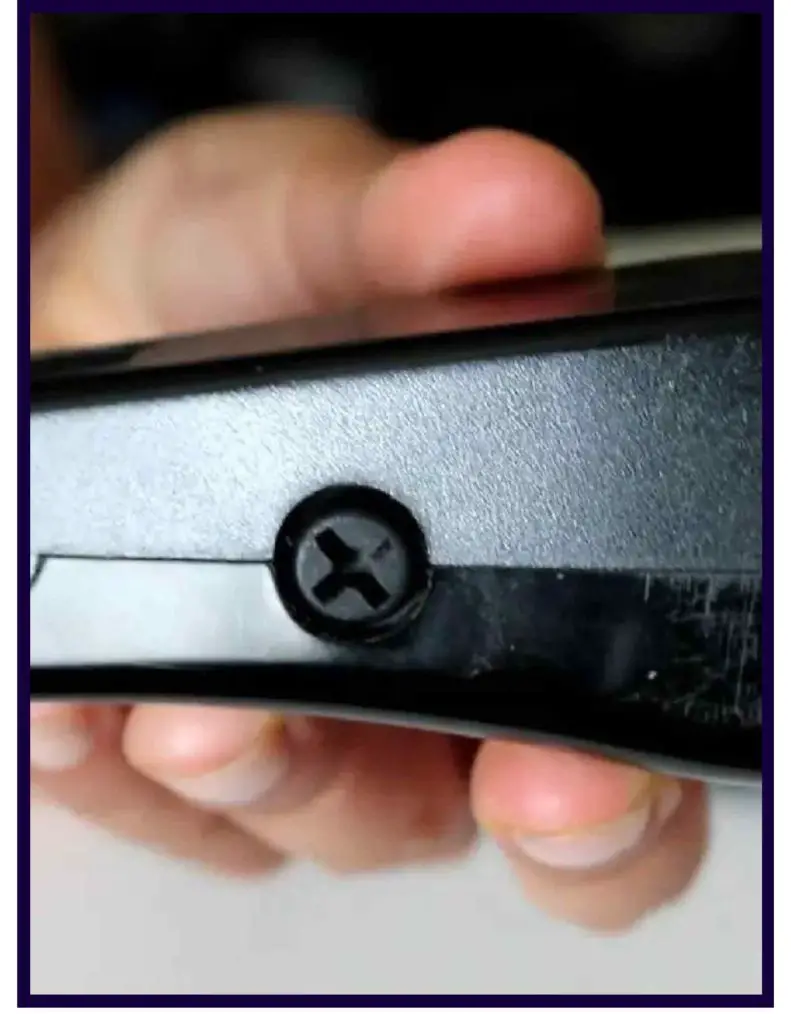
Step 1: Find the main power screw
It should be a large singular on the side of your clippers as shown below
Step 2: Power On
Turn on your clippers. You will need them on so you can tell when your clippers are adjusted correctly.
Step 3: Turn on and check
Using your screwdriver, turn the bolt clockwise until your clippers make a high screeching noise, stop here.
Then slowly turn the screw backward by half a turn. You should notice your hair clippers have dramatically become quieter.
If this is not the case, then you fine-tune, until you get the desired sound you want from your clippers.
This same method is used to (improve the power output of hair clipper blades.)
This video shows how to get more power to your blades:
Motor Problems
Your motor can be another reason why your clippers aren’t cutting.
It can be loose or weak and you could have no idea. We must tackle it head first and see if it’s the main reason why your clippers aren’t cutting correctly.
Step 1: Open the Hair clipper
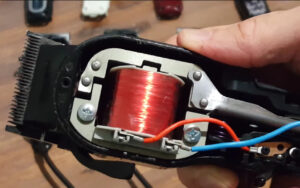
Unscrew the front casing on your clippers. When removing, you should be able to see the inside of your clippers
If you have a magnetic motor hair clipper, the inside of your clippers will look like the image below:
However, your clipper can also look like this:
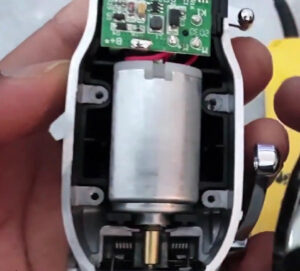
That is the inside of a pivot motor hair clipper, this solution works on this type of hair clipper too.
Step 2: Push down both Casing arms
Around the motor of the clipper of your clipper, you will notice a casing around the motor as shown below:
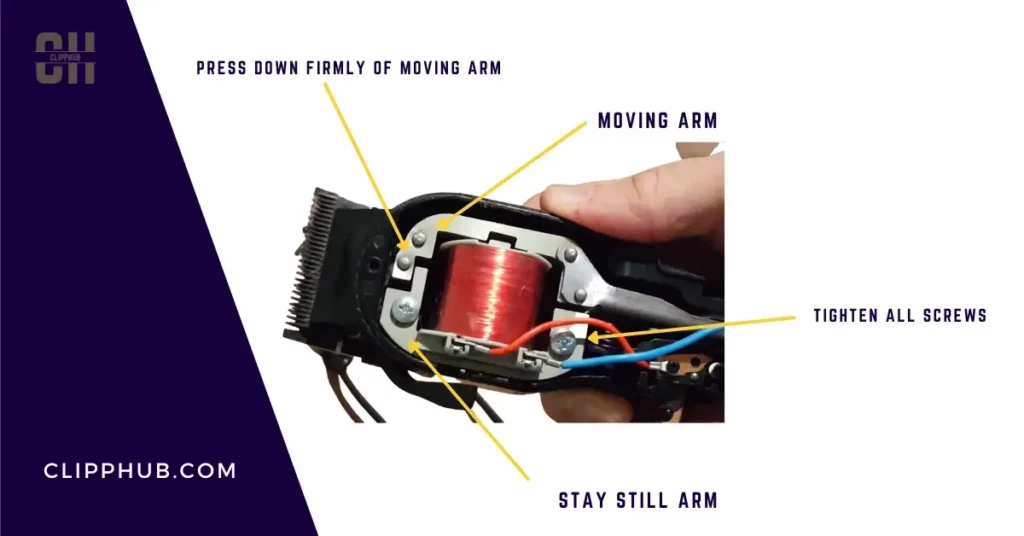
Using your screwdriver, Push down firmly on both the stationary and moving arms. This should set the casing back into place.
This can solve your rattling problem. To check, turn on your clipper and see if they still produce noise.
If they still do, you can troubleshoot one step further.
Step 3: Tighten the screws
Using your screwdriver, go around each screw on the arms and tighten them harder.
Turn the screws clockwise and tighten until you struggle to tighten anymore, but do not overdo it.
After you have tightened the screws, turn on your clippers and check to see if they still rattle.
Step 4: Attach the front casing
Attach the front Whole front casing back onto your hair clipper making sure all those screws are tight.
If you still notice your clippers don’t cut, the problem could lie elsewhere or you have a different type of motor.
Clipper Blades Moving But Not Cutting
Dull blades.
This is the final solution.
If your blades are blunt they simply won’t cut and so they need sharpening.
Simple right?
Yes, but before you sharpen your clippers, you must realize that when you sharpen your clippers, you taking a bit of life from your blades.
So check that your clippers really aren’t cutting and also check whether they’re pulling hair.
Also, the reason your clippers are blunt is that you don’t oil them.
I would suggest you oil your clippers first and give them a few tries if they still don’t cut you can sharpen them but afterward, you should still be oiling your clippers!
Pick up some hair clipper oil below.


Then oil your clippers, I detail everything in my guide on how to oil hair clippers.
But here’s where you can drop the oil:
Oil your clippers every two uses at the minimum, these reduce and stop your blades from blunting.
But if your blades are already bad and need sharpening, I provide detailed guides on how to sharpen your clippers with sandpaper or a grindstone.
How To Sharpen hair clippers with sandpaper (Full Guide)
How to Sharpen Clipper Blades With a Stone (Step-By-Step)
If you have a detachable blade clipper, check out this article on how to sharpen detachable clipper blades
But here is a quick run-through:
Step 1: Remove your clipper blades
Unbolt your blades from the hair clipper using a screwdriver. After this, you will see the two main blades that cut hair. This is your top cutting run and your top cutter as shown below
Ideally, the top cutter is the blade that cuts your hair and would be the one that needs to be prioritized if you want sharp cutting blades.
Now get your sandpaper ready.
Step 2: Sharpen your blades
Place the interior of your clipper blades on the sandpaper. Make sure you have your sandpaper on a flat surface.
Draw a line across the interior of both blades, this will let you know when your clippers are sufficiently sharpened.
Then in a sweeping motion move your hair clipper blade up and down on the sandpaper.
Keep your arm steady and make sure your blade is straight and not bending to the side.
If your blade is off slightly, you could be over-sharpening one side without even knowing.
Repeat this ten times. Afterward, take your hair clippers off the sandpaper and check how sharp they have gotten.
Do this for both blades.
Step 3: Change your sandpaper
If you notice you are struggling to keep hold of your blades while sharpening, use a magnet to hold your blade in place.
If you do not have one, you can slightly wet your sandpaper to that your blades can side on the surface easier.
But if you have gone on the sandpaper 10 times without a change in the sharpness or the mark you placed has not disappeared from your blade, then change the sandpaper.
Do not be afraid to do this. Doing this gives your blades a better surface to work against and you will see the results.
Step 4: Inspect the blade correctly
What you are looking for after 10 strokes on your sandpaper is a shiny and smooth blade.
You should be able to see a notable difference from the blade you began with.
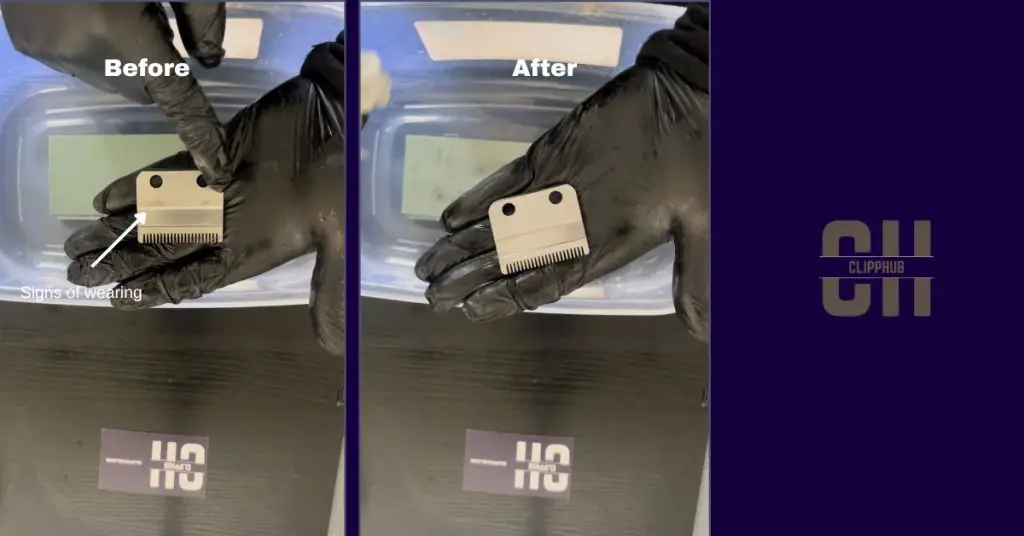
If your blades are not sharpened enough to your liking, opt for higher grit sandpaper or put more pressure onto your blades when sharpening.
Do not be lazy, sharpen properly and you will get the best results sooner.
Step 5: Clean the blades
Once you have got sharp and shiny look your desire you need to clean off the blade of any remaining residue.
Just use a piece of cloth to wipe down the blades and that should more than likely be enough to get them clean.
After this, you can put your clippers back together and screw the bolts back onto your blades.
But at this point, you can now zero gaps in your blades (not applicable to detachable blades)
This video shows how you can now zero-gap your blades:
Now at this point, your clippers should be back to cutting to their best!
Still nothing?
then you may have to re-invest in new blades or a new clipper,
These are my top choices for clippers:
Best Clippers for Fades (Master The Art Of Fading)
Best Hair Clippers For Home Use 2024: How to Choose and Use the Best Clippers

Best Cordless Hair Clippers in 2024 (The Ultimate Guide 7 Best Wireless Clippers)
If you have tried all of these troubleshooting steps and your hair clippers are still not cutting properly, it may be necessary to take them to a professional repair shop for further diagnosis and repair.
Conclusion
In this article, we went over the reasons why your hair clippers not cutting.
As we said it could be:
- Clogged blades
- Incorrect blade tension and alignment
- Low battery
- Motor problems
- Dull blades
After fixing your hair clippers, it’s important you keep up with maintenance to ensure their longevity.
If you have found this article helpful, please follow our newsletter to get the latest information on hair clippers.
Also, be sure to check out other articles on this topic.
FAQ
Do I need to oil my clippers after every cut?
No, you don’t need to oil your hair clipper after every cut. Look to oil your clippers your clipper before you cut then prioritize sterilizing them afterward, and oil if you plan on leaving them for a while.
Hair clippers may not cut due to dull blades, clogged blades, loose parts, or a lack of oil. Cleaning and maintaining your clippers regularly can help prevent these issues.
Oil your clippers every 2-3 uses after cleaning them. This prevents your clippers from blunting.