How To Sharpen hair clippers with sandpaper (Full Guide)
How to sharpen hair clippers with sandpaper.
If that’s the question in mind, then you are in the right place.
In this article, I’ll go through the process of flat blade sharpening and hollow blade sharpening.
We’ll go over the benefits of each as well as what you should always look out for before sharpening your blades.
As well as the complete process of sharpening your clippers at home with sandpaper
With that said, let’s get into it.
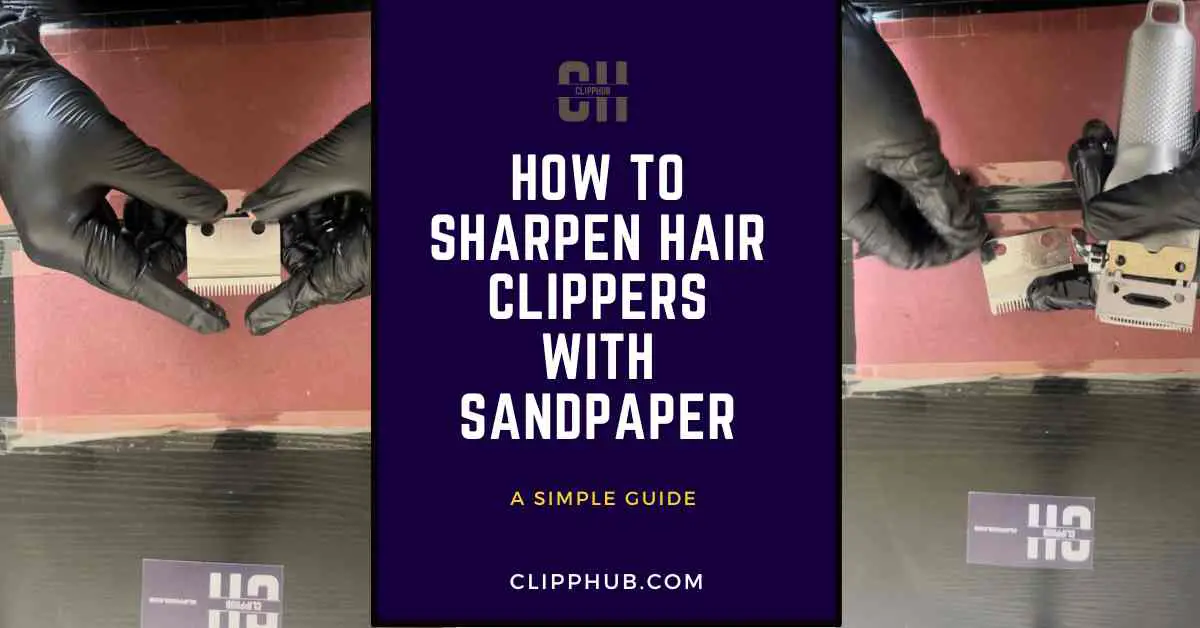
How To Sharpen Hair Clippers With sandpaper
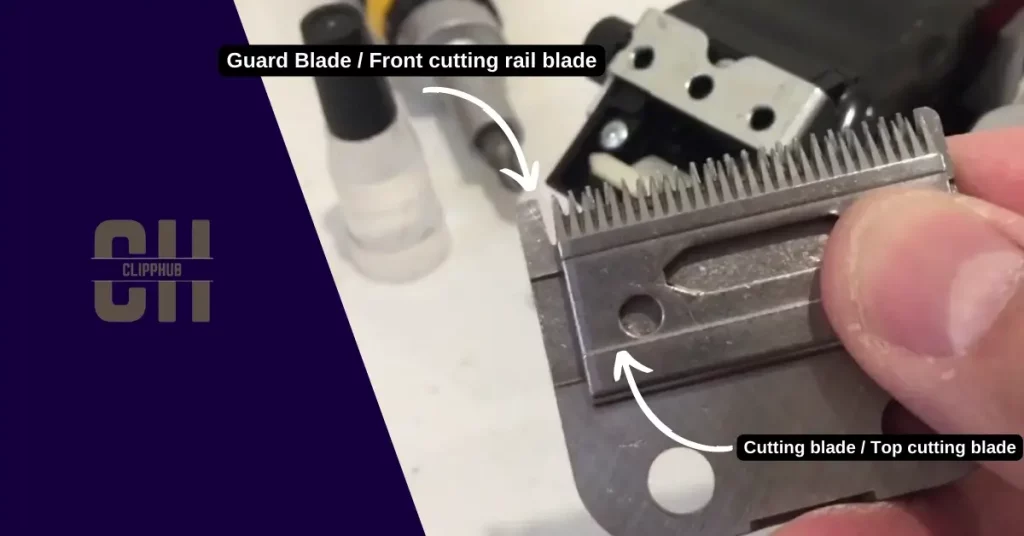
The image above is to help guide you to understand the parts I will be mentioning.
Now, this is a quick outline of how to sharpen your hair clippers with sandpaper.
Take one of the blades and put the flat side of the blade at the top of your 180 grit sandpaper with the blade teeth facing away from you.
When you notice a difference in the look of the blade, take it off the 180-grit side and double the number of strokes on the 240-grit sandpaper.
This will buff out the blade.
Do this entire process for both of the blades you removed.
Watch the Full Process
This is only a quick overview of sharpening hair clippers but did you know this is only a small part of the clipper maintenance process?
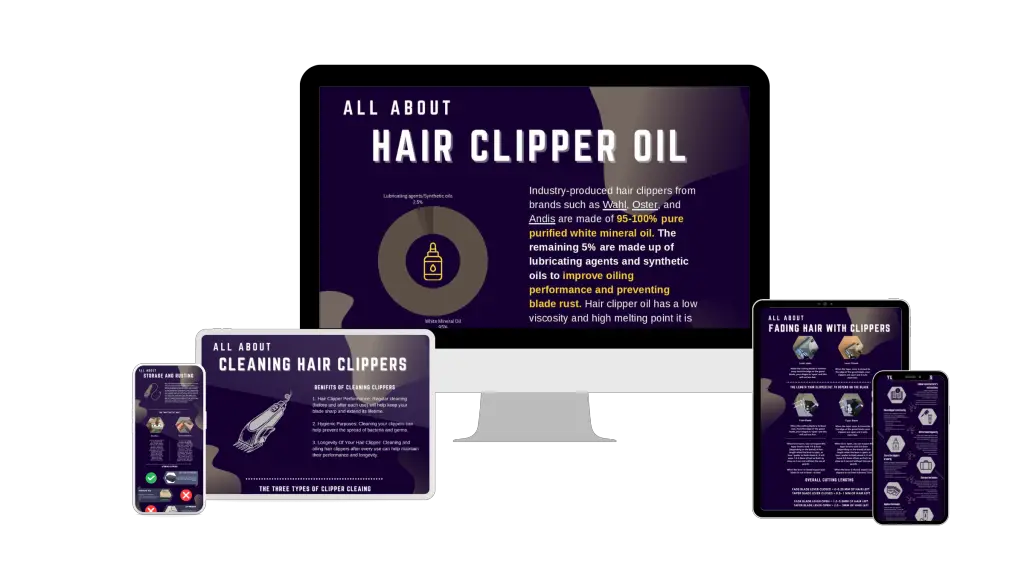
Why not cover, cleaning, oiling, troubleshooting, and even how to use your clippers to fade… using the 1-minute, Clipphub cheatsheets from the New Clipper Mastery Bundle?
Fast-track your clipper mastery by grabbing them below:
In the rest of this guide, we’ll go through the process in more detail.
But before this.. how would you actually know if your clippers needed sharpening?
We go through this next.
How do I know if my hair clipper blades need sharpening?
The method of sharpening I outline above and below in more detail is flat surface sharpening.
Flat blade sharpening is a boost you can give to your clippers at home when they show the #1 sign of a blade of trimmers in need of sharpening (We’ll get to this later).
But there’s a reason professional blade sharpening is important, that’s because flat blade sharpening doesn’t give blades a natural hollow that’s needed to really make them sharp and highly effective.
In order to do hollow blade sharpening, you’ll need to do a grinding wheel. These wheels are expensive but they have a unique property that allows them to create a “hollow” in a blade.
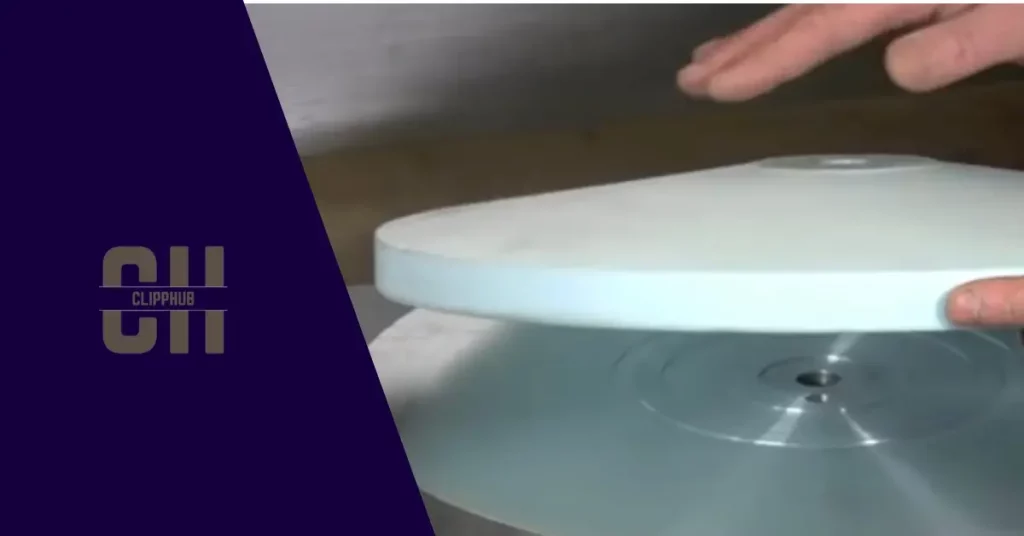
These sharpening wheels have a slight slant to them.
When a blade is passed over this wheel it creates a hollow on a blade that’s hard to notice if you don’t know what you’re looking for, but you will subtly form this shape.
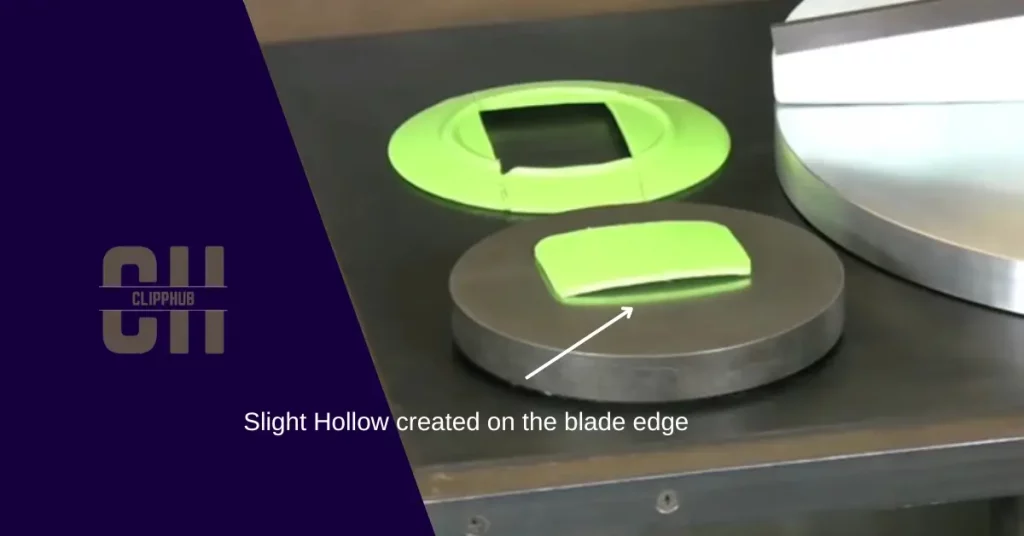
That curve is a “hollow”. The plastic is exaggerated, it’s not as obvious as this but if you were to look at your baldes with a microscope, they’d have this shape.
The degree to which this hollow is formed depends on the:
- Sharpening angle
- Pressure applied while sharpening
- The duration of sharpening
What are the benefits of this?
This intentional unevenness serves a purpose. When the edges of your blade(the lowest point of the blade), make direct contact with the hair or fur being cut, the sloping effect helps guide the cut material to the center of the blade(the “highest” point of the blade).
The unevenness of the hollow ground blade helps with efficient hair or fur capture and cutting. The unevenness of the hollow ground blade helps with efficient hair capture and cutting. As the clipper moves through the hair, the center of the blade, which is the sharpest and highest point, does the bulk of the cutting.
The sloping sides of the blade guide the hair towards the center, ensuring a smooth cutting action and preventing the hair from getting caught or pulled.
Flat sharpening which is the method outlined in this guide, is more of temporary blade sharpening that will definitely sharpen up your blades, but if you keep doing it over many years, your blades will lose their natural hollow.
But don’t do it more than 3 times before visiting a professional blade sharpener to get hollow back in your blades.
Proffesional blade sharpeners will know the right hollow for your blades and are a good investment for your blades’ longevity.
Search for one in your local area once you’ve flat-sharpened your blades a few times.
But again… don’t panic if can find a blade sharpener. Flat blade sharpening is effective enough to get your blades cutting better but if you want the best treatment for your blades visit a proffesional for hollow ground sharpening when you can.
Signs To Sharpen Blades
Un-even Cuts
Dull clipper blades produce uneven or choppy haircuts.
If you’re noticing that the hair is being cut at different lengths, or that the hair is being cut in a jagged or uneven way, it’s probably time to give them a sharpen.
The #1 sign your hair clippers need sharpening.
Hair clippers need sharpening when they pull hair.
Pulled hair is a sign that your blades cannot be cut. From this point, you can look into it further and decide whether your blades need cleaning or sharpening.
Always clean and oil your clippers first. When you have done this and still notice hair pulling, you can take your blades to a grindstone or sandpaper.
Check the charge
Also, look into the plug and battery of your clippers. If you have a cordless hair clipper you most likely have a battery.
Batteries over a long period wear out. The constant recharges over months and years mean that the clippers can lose their power output too.
Check your batteries are in top condition. A shortage of power can mean your clipper blades do not move as quickly. This is especially the case with Rotary motor hair clippers.
With corded clippers, make sure your hair clippers are all the way plugged in. You’d be surprised how often this has tricked people into thinking their blades are done for.
Always make sure the socket you plug your blades in outputs enough power to move your blades correctly.
Do your blades still pull hair? If your clippers still pull hair even after all of these checks, then you can get them sharpened. I will guide you in detail on how to do this later on by yourself, at home.
But why do I recommend you do you sharpen your blades instead of a ‘professional’? I’ll tell you why below.
Clean
Do not sharpen if your clippers are dirty. Yes, sometimes, people think just because their blades are a bit grimy they need sharpening.
Don’t do that. All you doing is thinning your blade further unnecessarily. Look to clean and maintain your clippers, then if any of the other signs I talk about appear, then it’s justified for you to sharpen your blades.
Blade Replacement
Sometimes your blades may be past their shelf life and they may need to be replaced or be looked at by a professional.
Here’s what you need to look out for:
Rough blades
If you run your finger over the blade and it feels rough or gritty, it can be a sign that the blade needs to be sharpened.
However, if it’s very rough or even cuts you, you may need to get your clippers blades completely replaced or get them sharpened by a professional.
Chips / Rust
If you can see that the blades of your hair clippers are chipped, or have severe rust, then avoid sharpening them.
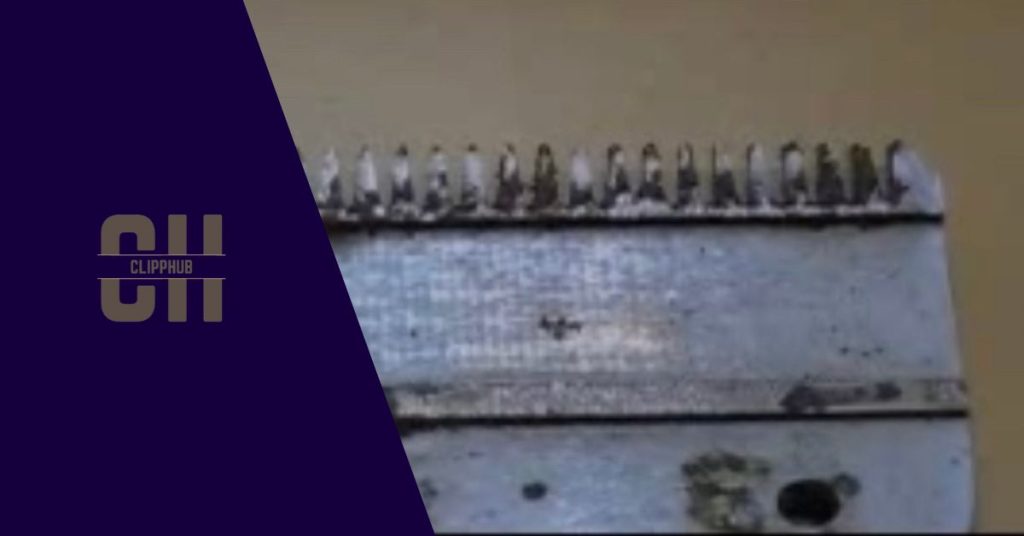
If your blades look anything like the image above, you’ll want to avoid sharpening your blades, it’s too damaged, and sharpening them for the first time may make it worse, Either resolve them or get them sharpened professionally as they need more than just sharpening.
The hollow ground is Completely Worn out
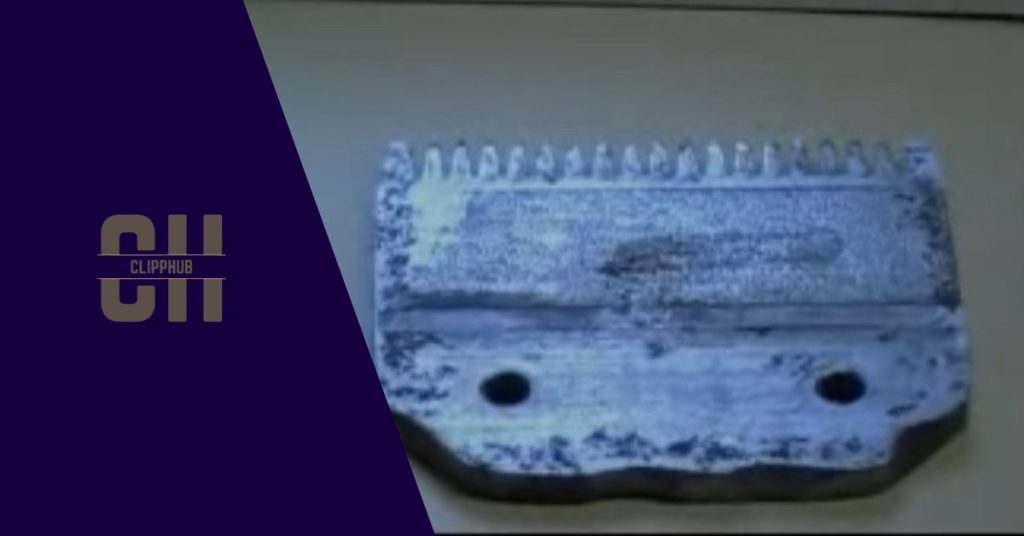
If your blades have flat-sharpened too much (over many years), then they may look like this when you take them off.
If that’s the case you want to avoid sharpening..simply because there’s not much to sharpening. Your blade has been worn down as much as it could possibly go.
At this point, replacement if you only move.
Ideally
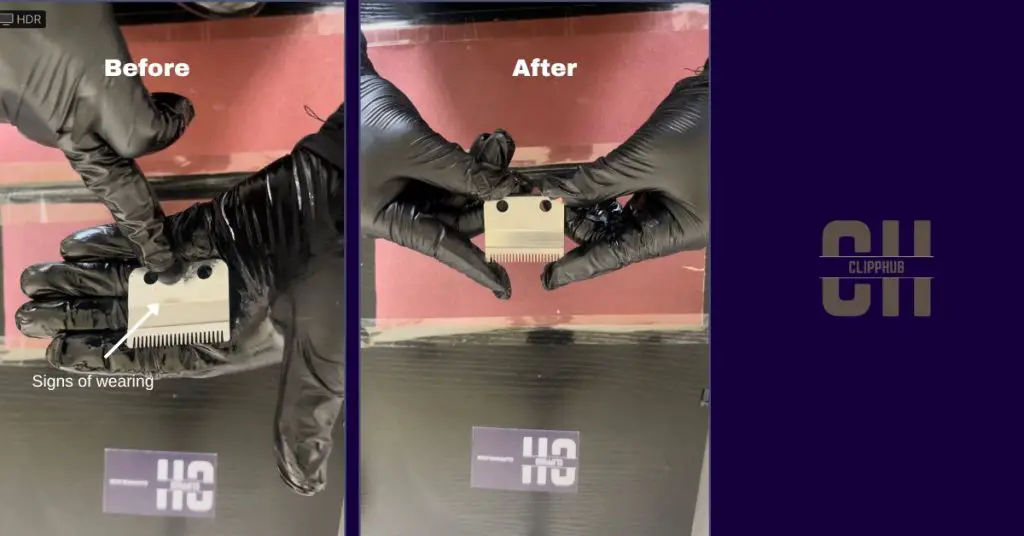
Ideally, when you remove your blades you want most of your blade to look clean, but still show certain signs of dulling and wearing like below:
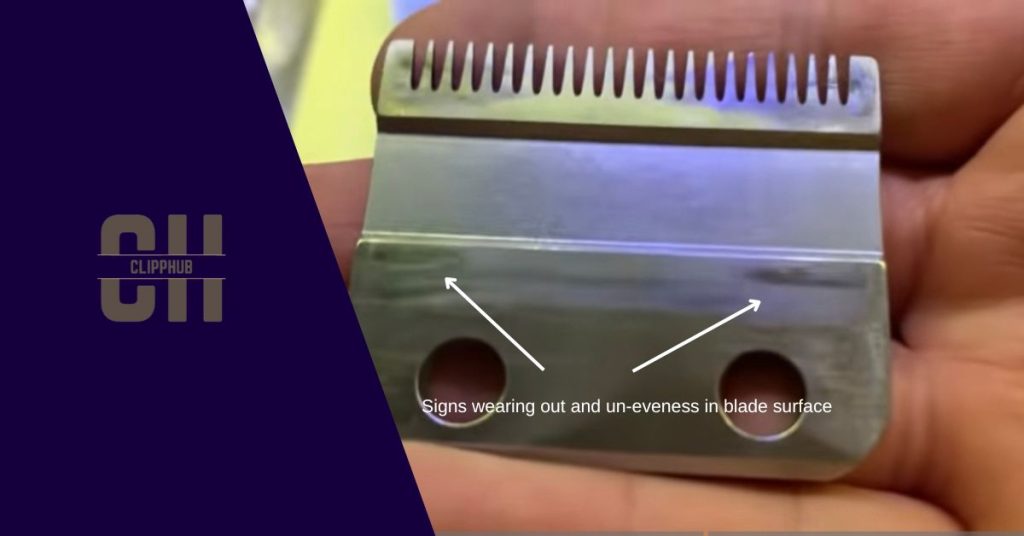
If your blades look somewhat like this, then they’re good to be sharpened (Yes, it may vary but just make sure there isn’t too much damage on the blades).
How To Sharpen Clipper Blades With Sandpaper
Before you look to sharpen your hair clippers there are some tools you will need. Look to grab them if you don’t have them currently.
You will need:
- 180 and 240-grit sandpaper
- Screwdriver
- Magnet
- Hair clipper oil


How to Sharpen Clipper Blades at Home
You are now all ready to go. Hair clipper sharpening is a simple process. If you are patient and take your time with the steps below, you’ll have almost a brand-new pair of hair clipper blades.
But wait. Before we begin I must stress that your hair clippers need to be clean for a few reasons:
- To make sure the sandpaper can sharpen the blade deeply
- So you can see the change on your blade as it’s being sharpened.
Avoid cleaning your clippers, and you walk into this process blind.
If you are unsure of how to clean hair clippers thoroughly, I have an in-depth guide on how to get your hair clippers clean.
All clean? Let’s start.
Step 1: Remove your clipper blades

Make sure it’s on a flat surface and if you can sellotape it down.
Step 2: How To Sharpen Clipper Blades With Sandpaper
and do it again. Do this while applying reasonable pressure(You should hear a scraping noise as you sharpen).
That’s the process and as you do it, keep your arm straight.
Step 3: Change your sandpaper
You want that consistent pressure on all sides of the blade so it would be beneficial.
Step 4: Inspect the blade correctly
If you have nothing yet, then do a couple more strokes, maybe 5 more, and press down a little harder.
This will buff out the blade.
If still nothing, stop, forcing it any more will do more damage to your blades.
Step 5: Clean the blades
You can even go one step further and zero-gap your clipper blades as you put them back on your clippers.
This video goes through the whole process:
Step 6: Oil your blades
Now that your blades are sharpened and back on your clippers, you need to oil them in order to reduce the friction between the blades.


here is a quick image of where to drop your oil:

How To Oil Hair Clippers – (The ULTIMATE Guide)
After dropping the oil in these spots, turn on your clippers to work the oil around the blades and then wipe away any excess oil.
The video below is a visual guide to this process:
How to look after your clipper blades so that they last longer
The hard part is done. Now you just have to keep your clipper blades in good condition so you don’t have to buy a new pair.
You should always look to be constantly cleaning your blades when you can. Ideally, you should be looking to deeply clean and sterilize your hair clippers every 2-3 uses if you use them casually.
If you are a barber and you use your blades constantly, you should be cleaning your blades every 1-2 uses.
Not only does this keep your blades hygienic but also helps your clipper blades to last as long as possible.
Oil your clippers regularly:
You should be looking to oil your clippers every 2-3 uses.
On top of cleaning, you must oil your blades too. If you do not have hair clipper oil, you can use other great alternatives such as mineral oil and baby oil.
But if you don’t have these either, Vegetable oils such as canola oil and olive oil can be decent alternatives.
However, these oils along with gun oil and sewing machine oil should be used as a stopgap as these oils can build up in your clippers. This dirt can blunt your hair clipper blades.
Store your hair clippers away correctly
It’s important to store your hair clippers correctly to prevent damage to the blades.
Storing them in a damp location can lead to rust, which can render your clippers useless even if you try to sharpen them.
Store your clippers in a moisture-free area to avoid rust and ensure that they perform at their best and last for a long time.
Look to use barber bags for this process.
By following this advice, you can maintain the quality of your hair clippers and get the most out of them.
Conclusion
Hopefully, you understand how to sharpen hair clippers with sandpaper using this simple process:
- Unscrew your hair clippers and separate the top cutter blade from the cutting blade
- Take one of the blades and put the flat side on the sandpaper.
- Move the blade in a flat up-and-down motion, do this 10 times.
- Look for a shiny finish to show that the previous layer of metal has been removed.
Sharpening hair clippers with sandpaper is a skill that you easily learn and do not have to pay stupid prices for.
I hope my guide has given you the confidence and insight on how to sharpen hair clipper blades with sandpaper.
If you have found this article helpful, please leave your experience with clipper sharpening using sandpaper and check out other articles relating to this topic below: