Babyliss.A reliable hair clipper brand that produces some of the best hair clippers in the market.
However at times, their clippers can be problematic and you can find yourself asking, Why are my Babyliss hair clippers so Loud?
I once was at this stage and was on the verge of buying and new pair but I did the research and found solutions and I would like to share them with you.
So with that said, let’s begin.
why are my Babyliss trimmers so loud
Asking yourself, what are my Babyliss trimmers so loud can leave you very confused.
Like every other hair clipper brand, there is a multitude of reasons why your hair clippers can be loud.
It can be external regarding the blade teeth and blade alignment but it can also be internal with problems coming from the motor and the ceramic blade.
Either one can cause a Babyliss trimmer noise.
While the noises can be annoying and push you to leave your clippers or simply looking to get a new pair, don’t be too trigger-happy in dis-owning your clippers
The possible problems can easily be resolved.
In this article, I will go through the correct process for troubleshooting your loud Babyliss hair clippers.
With each solution, you will narrow down the reason why your Babyliss clippers are producing loud noises.
But before we begin you should understand why your clippers may be producing a loud noise.
Internal factors are 70% of the cause of loud Babyliss clippers.
I’m not sure what I mean. I Explain it next
Why are my Babyliss clippers so loud?
Most Babyliss clippers are cordless and contain a rotary motor. Cordless rotary motors are and can provide great cutting performance.
However, the movement of rotary motors can cause damage to other parts within a hair clipper.
This video below, explains visually how rotary motors function.
As you can see, the rotary motor cylinder oscillates from side to side to move the cutting blade. Nothing crazy…
But the main point of attention is for the blade to move, the motor has to connect with the ceramic on the back of the cutting blade.
This whole process is nothing mind-blowing, in fact, that’s exactly how Babyliss want their motor and blade to function.
However, what tends to happen is that the ceramic blade wears out. This is due to the constant friction with the rotating cylinder.
Now, the ceramic on your cutting blade should be able to handle the friction from the motor but in some cases, whether it’s poor manufacturing or a displaced motor, the friction can become too much to the ceramic, and therefore it slowly deforms.
This Deformation of the ceramic blade is what eventually causes your Babyliss clippers to produce a loud noise the ceramic and top cutting blades stop working in unison, they just smack against each other constantly, only making the noise worse.
We want to stop and later on in this article, I will provide the steps of how to do so.
However, this internal problem is only one of the possible internal problems that can cause loud Babyliss clippers.
There is another type of problem that causes noise but luckily. It can be fixed quickly.
Babyliss Clipper Maintenance
Basic clipper maintenance. yes, I know boring but it can be one of the reasons why your clippers are producing noise.
You should always maintain your clippers either through Cleaning and sterilizing, oiling, or aligning.
These are small actions but can make your clippers last a very long time and stop them from making irritating noises.
The basics of hair clipper maintenance starts with cleaning. So let’s begin here.
ools needed:
Screwdriver
Toothpick
Brush
Hair clipper oil
Water
Step 1: Remove your clipper blades
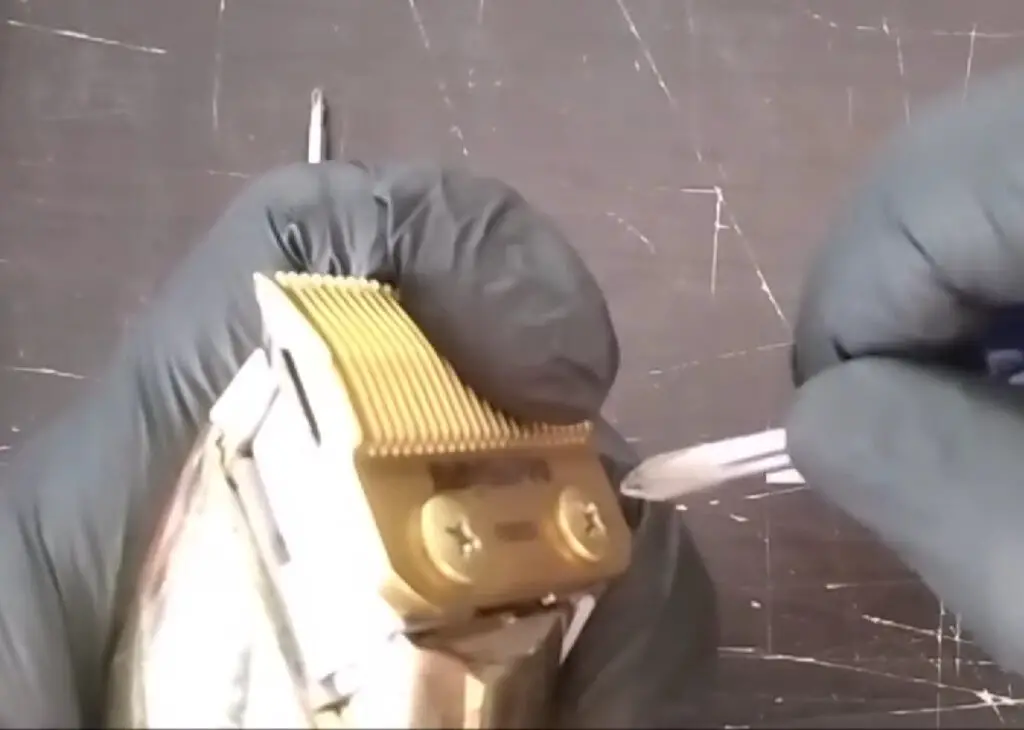
Unbolt your blades from the hair clipper using a screwdriver. Make sure to hold down your hair clipper blade
The spring within a Babyliss clipper can be powerful and cause your clipper to jerk back
After this, you will see the two main blades that cut hair. This is your top cutting rail and your top cutter as shown below
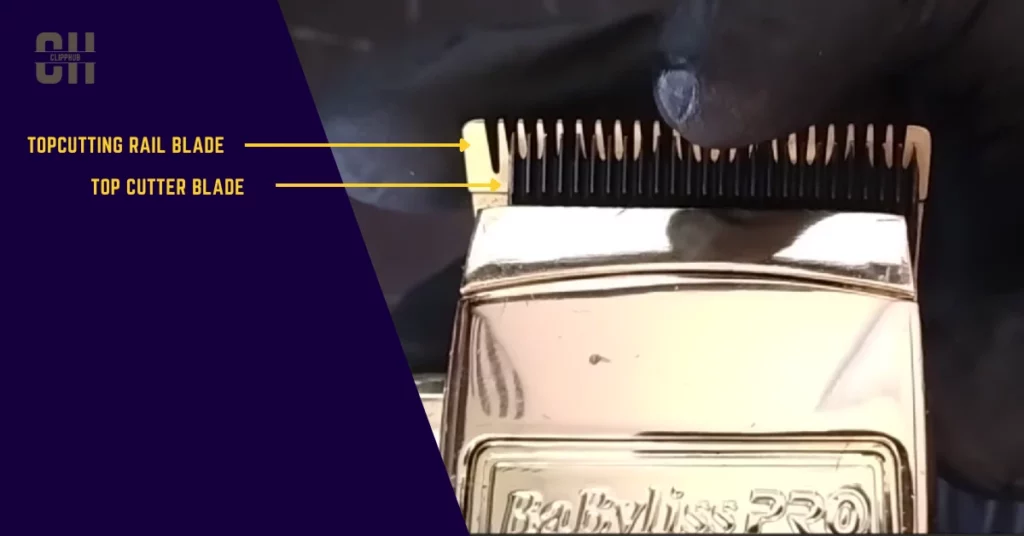
Ideally, the top cutter is the blade that cuts your hair and would be the one that needs to be prioritized if you want to remove all rattling.
However, for now, we’re focused on cleaning so remove both the top cutter blade and then the top cutting rail blade.
You will notice that the top cutting blade is attached to two springs. Gently push the blade out of the springs and it should come off easily,
Step 2: Clean the Blade
First, take the top cutting blade and brush down making sure any dirt and oil or has been removed from the blade. Do that for the top-cutting rain blade too.
Now rinse the blade with cold water for a few seconds then dry it off with a cloth.
Step 3: Clean the Inside hair clipper
Now both blades are clean, you can look at cleaning the inside of the hair clipper.
Holding your clippers, look inside, if there is a larger build-up of hair inside, it needs to go.
This hair build-up does not make your clippers perform poorly but they add to the friction that can cause noise.
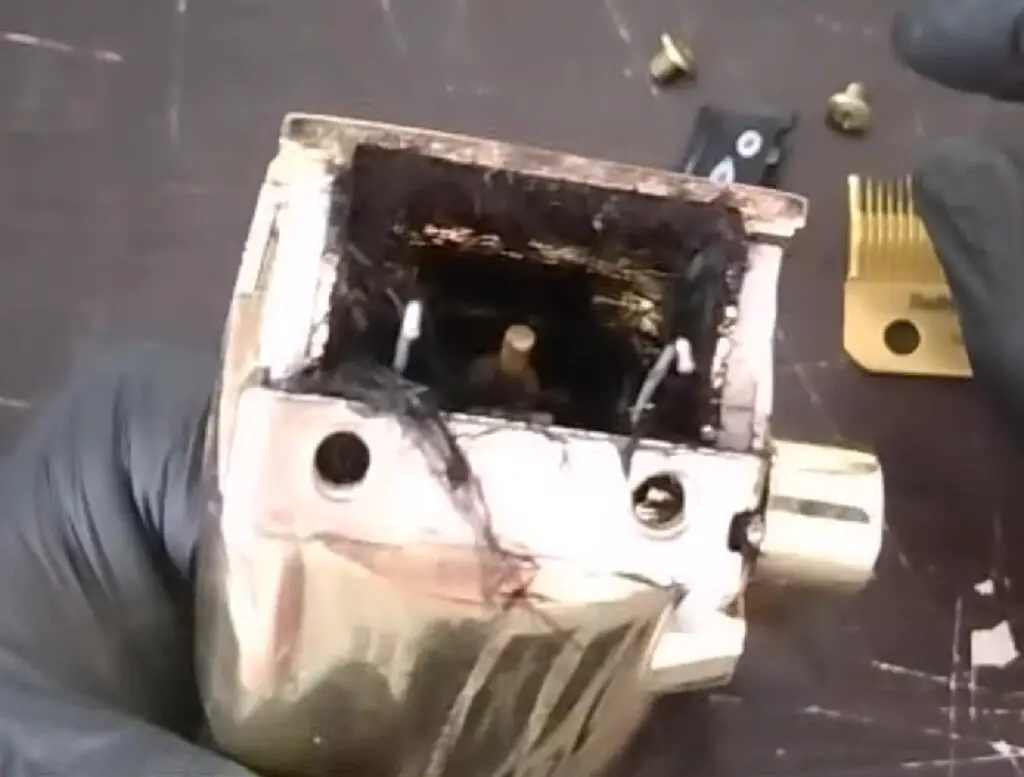
Using a toothpick or brush, pick out any hair inside or around the top of the motor
Once the inside of the blade has been cleaned you can now look to attacking your blade back onto your clipper.
Extra: while you are here, also check the inside of your ceramic blade. If you notice any wearing /damage to the clip-on on your ceramic blade, take note of this as this is another cause of noise with Babyliss clippers.
I will expand more on this later.
Step 4: Check blade teeth
Before you attack the blade back onto your clippers, you must check the teeth of both blades.
Now that they are clean, you should be able to check for damage. Damaged teeth can cause friction between both blades which causes a loud noise.
Run your finger across the top of both blades. They both should be smooth and you should be able to run across both wi though encountering any large bumps or cuts.
If you notice any of these you will most likely ha be to get your blades replaced, you can get a replacement blade for your Babyliss clippers here.
Later on, in this article, I will explain how to attach new blades to your Babyliss clippers.
Step 5: Re-resemble your clippers
If your blades are in good shape, and you don’t see any damage to the ceramic on your blades, you can place them back onto your clippers.
Otherwise, hold on tight and move on to the next part section of this article before you come back here.
Begin by placing your top cutting blade back onto the springs on your clippers
Now take the top cutting rail blade and place that on your top cutter blade making sure the holes align
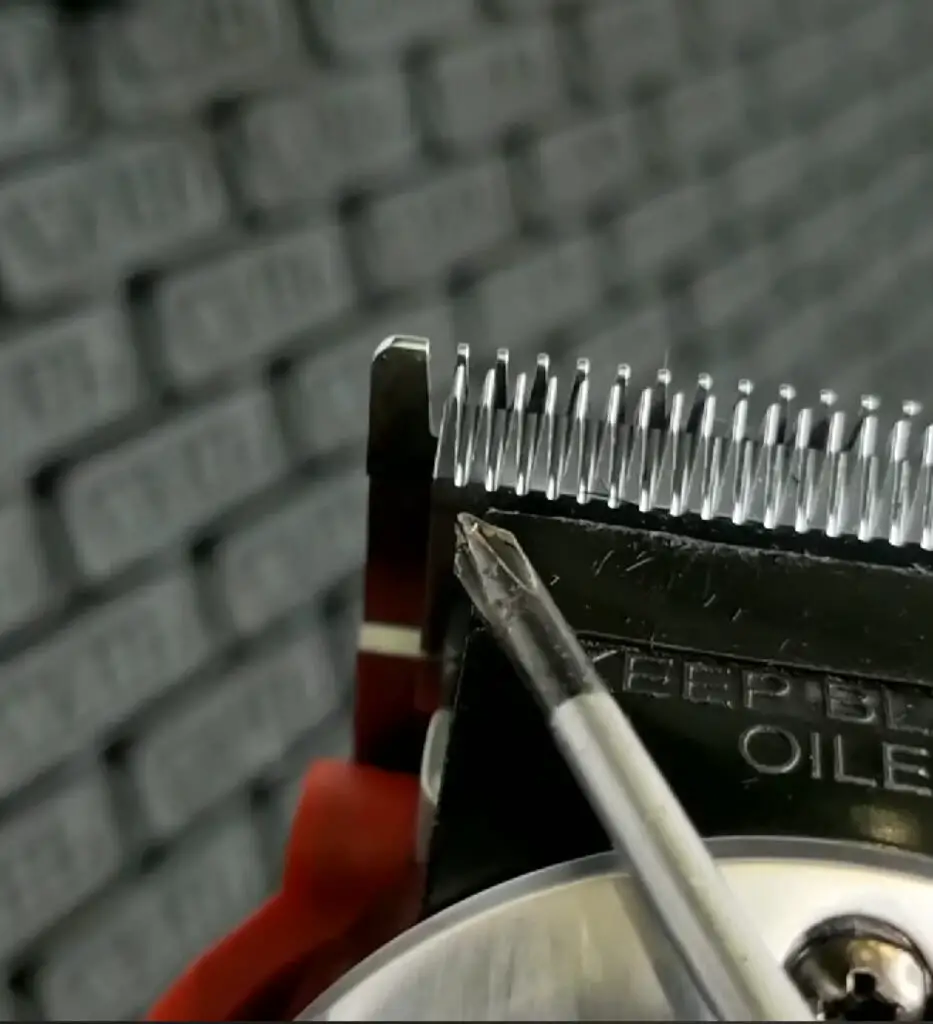
Now take your screws and screw them back into place,
However, don’t screw them as you have to align your blades first.
Step 6: Align clippers
Your blades need to be aligned correctly for two reasons
- It stops your blades from cutting the skin
- Makes sure there is enough distance between the blades
This is how your Babyliss clippers should align:
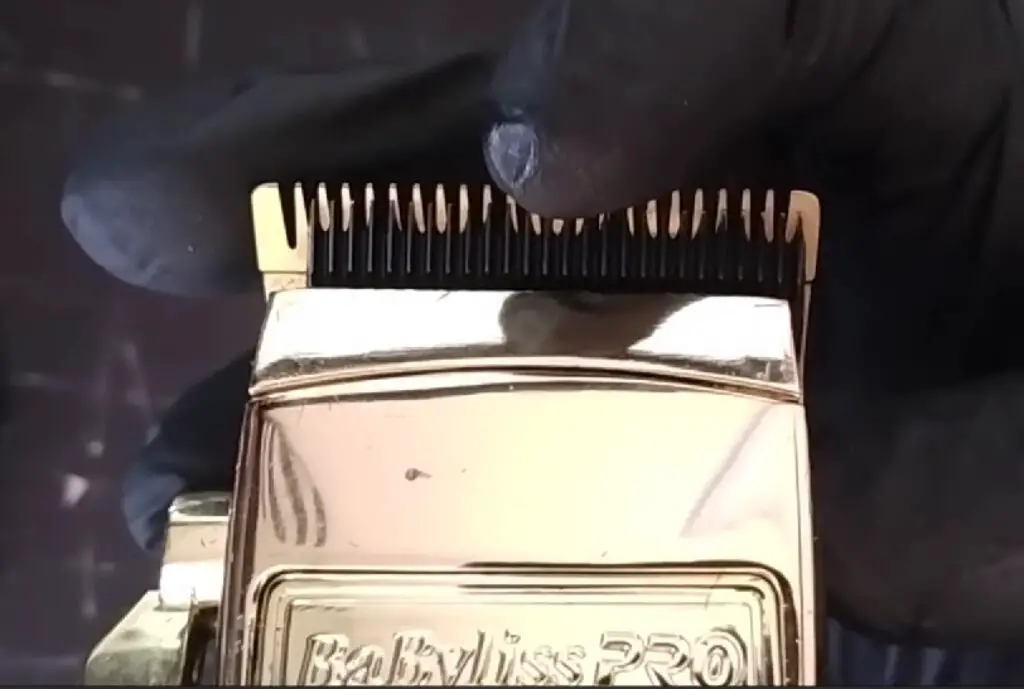
Always make sure the first tooth of the clipper is lined up with the second tooth of the front cutting rail and the last tooth of the front cutting blade is just on the inside of the last tooth of the front cutting rail
Also make sure the distance between the top teeth of both the front cutting rail blade and the top cutter blade is 0.8mm thick, the same depth as a credit card.
To achieve this, tighten the screws on the back of the blade. However leave enough wiggle room, so you can make the right adjustments, when everything is in place, you can pop the blade back into your hair clippers.
Once your clipper is back together, turn them on and see how they sound.
If you still notice rattling, the problem lies elsewhere. I will cover other possible solutions further down in this article.
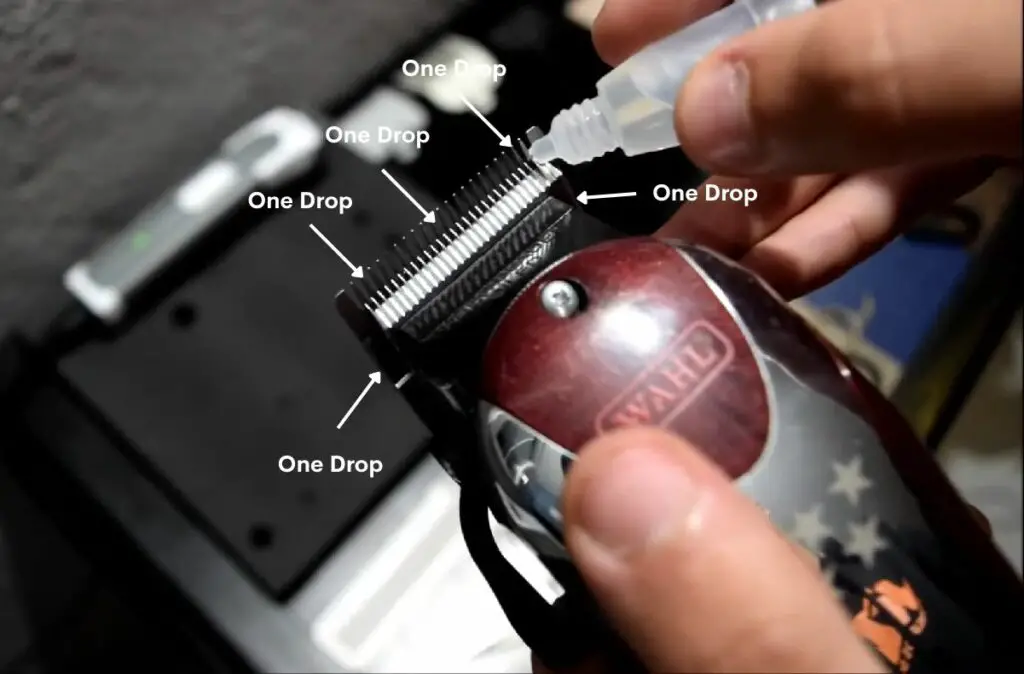
7: Oil you clippers
Now that your blades are clean, you should look to oil them.
Clipper blades need to be oiled to reduce the friction and heat between both blades, which at times can cause clippers to rattle.
You can use regular hair clipper oil for this process but if you do not currently have it, you can also use baby oil or mineral oil.
Place 3 drops drop of oil where bothering blades meet and 2 drops on either side of the blade
Babyliss Ceramic replacement replacement
This section is a further expansion on internal hair clipper noise solutions.
As I mentioned earlier if you had previously noticed any damage to the ceramic on your top cutter blade, you should look to get it lubricated or replaced.
I will show you the prices for Borge however, for now, let’s start with lubricating to help ease the friction between the motor and the ceramic if there is little damage and wear.
TOOLS YOU WILL NEED:
Flat head screwdriver
Flat nose plier
Cotton buds
Step 1: Check the motor
Once your blade is unscrewed you should see a metal piece sticking out from your clipper
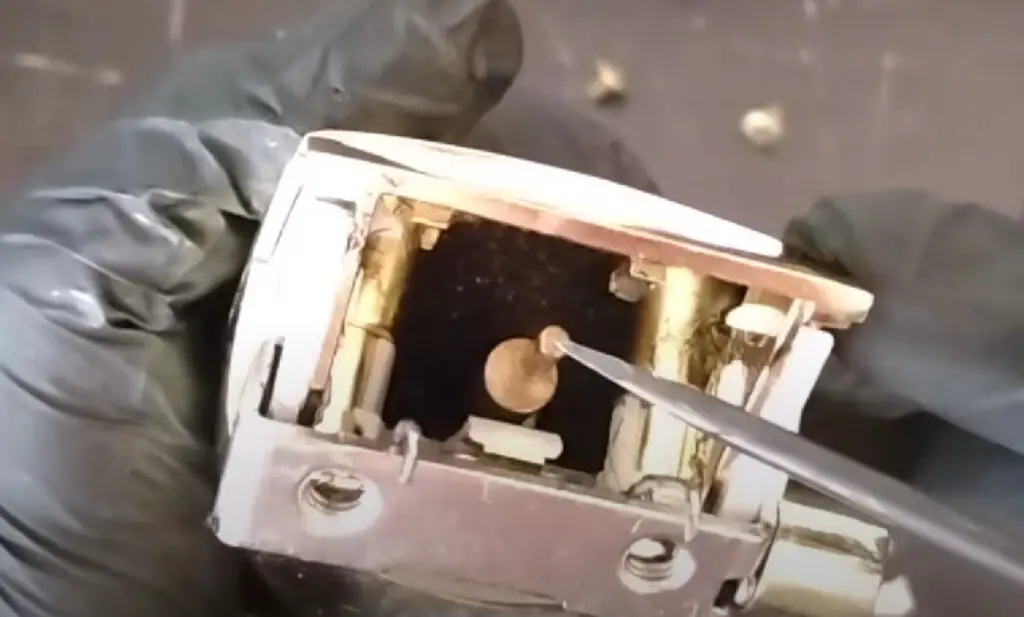
Take your Cotton buds and add some lithium on the end.
Step 2: Apply Lubricant
Now smear the grease along the inside of the ceramic holder.
Make it all around and spread it evenly.
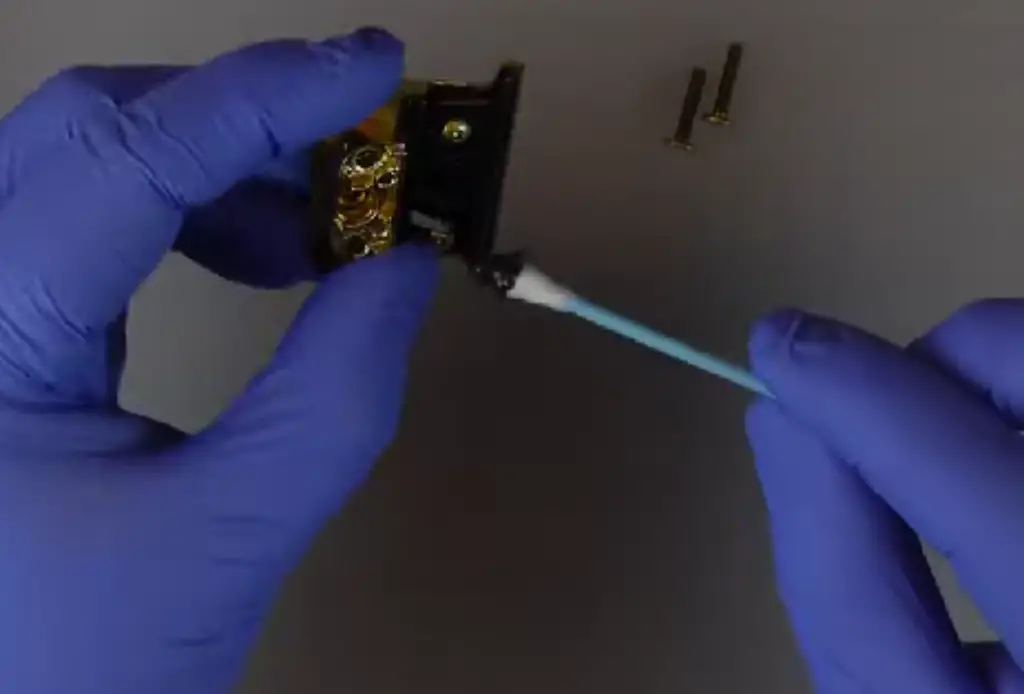
This should provide enough lubricant to reduce the friction between the motor and the ceramic itself
Step 3: Check for change
Now you can place the top cutter back onto your clipper and follow this with the top cutting rail, making sure they are aligned correctly
I detail the steps to this in the maintenance part of this article.
Now turn your clippers on and check the sound.
If the loud noise persists. It’s time to replace the ceramic, it’s most likely too far gone.
In addition to the tools above, you will have to purchase the
Babyliss 802 replacement blade.
Step 4: Replace
Remove the ceramics on the back of the top cutter blade by pushing it out
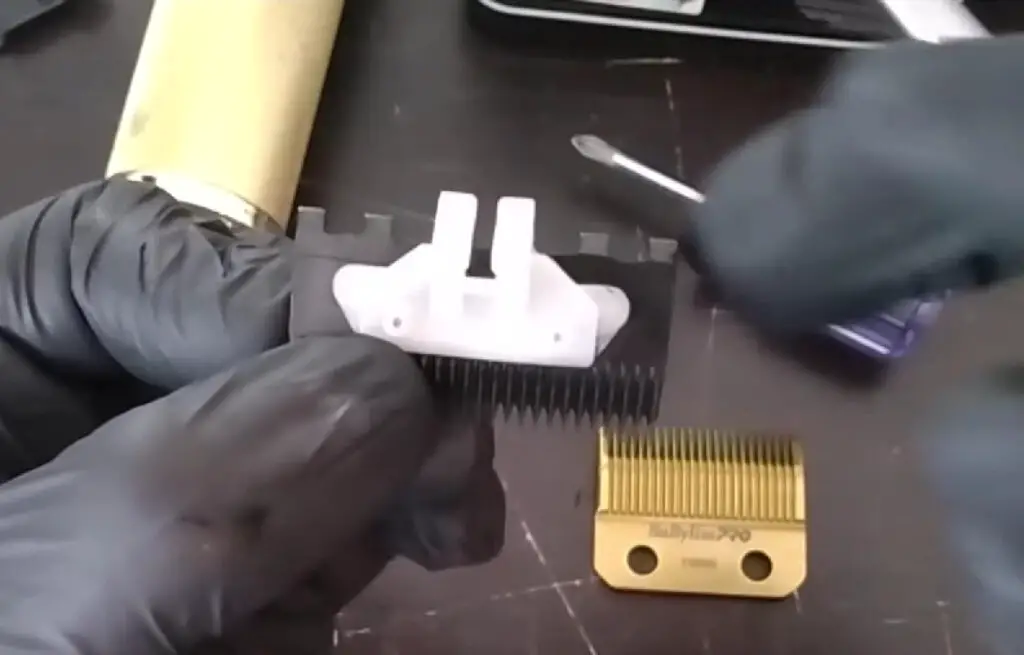
Then take a flathead screwdriver and wedge it in between the top cutter and the ceramic, apply a bit off (not too much) and it should come off
Do this for both blades, old and new
Step 2:
Now you can pop the new ceramic back into the slot on of your old blade, it should fit smoothly with not much difficulty.
Step 3:
Now you can resemble the hair clipper. Pop the top cutter blade with the new ceramic back onto the spring holes and let it sit.
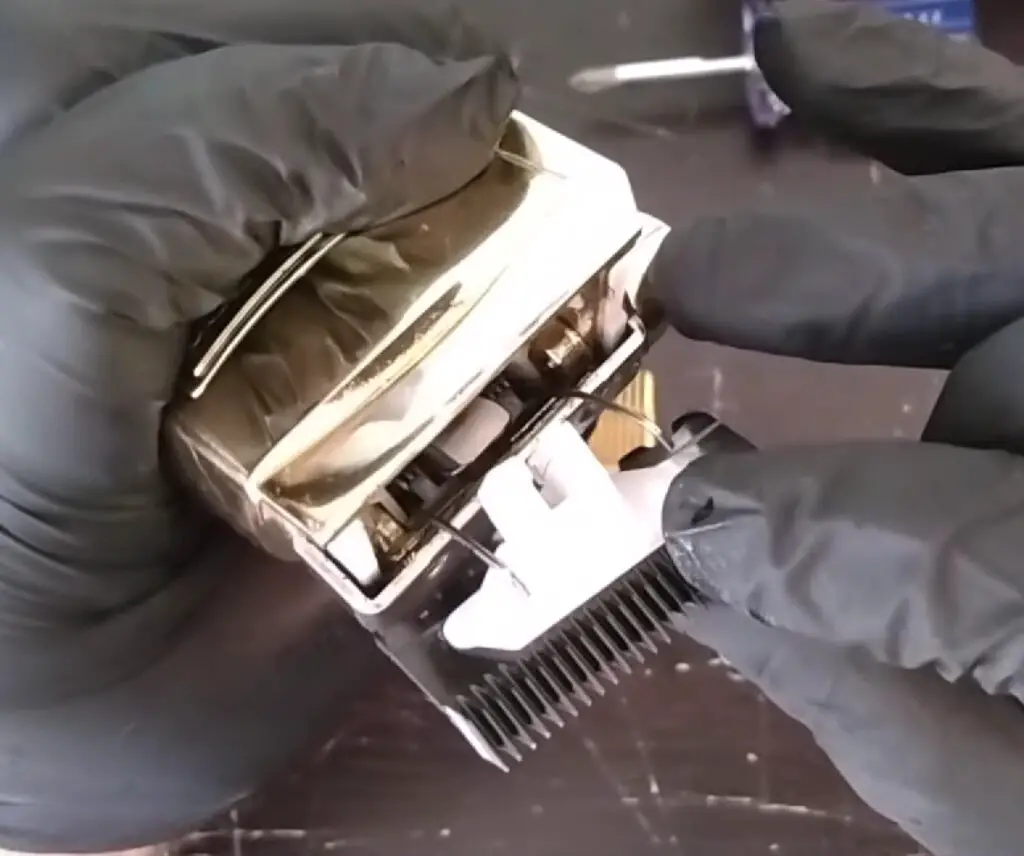
Then take the top cutting rail blade, align it with your top cutter blade, and the screws
Now check both blades are aligned correctly and you can now screw them back on together.
Make sure both screws are tight and there is no movement.
Now turn your clippers and they should be sounding just like new!
Conclusion
If you came to this article asking yourself why are my Babyliss clippers so loud and you should know now the cause and the solution
As mentioned In the article, you should look to make sure:
- Your clippers are maintained
- There is little friction between the ceramic and the motor
- Your ceramic is in its best condition
By making sure these are all done your Babyliss coolers should be noiseless and perform at their best.
If you have four This ar let helpful, please check out my other brand noise clipper solution guides

