In this article, we’ll go over how to blend fade lines.
I’ll show you how they’re formed and you’ll understand how you can blend each fade line no matter the hair texture or style.
With that said, let’s get into it.
How to Blend Fade Lines
In order to blend smoothly, you’ll need a pair of clippers specifically made for this task.
You can find them in our article on the best hair clippers for fades.
Best Clippers for Fades (Master The Art Of Fading)
Clipper guards and the clipper lever work together to cut hair.
When it comes to fading, it’s best you understand the difference in how the makeup of your blades can affect their cutting length.
check out this guide to have a better understanding of the differences between fade blades and taper blades:
How Much Length Does a Taper Lever Add? (Clipper Lever 101)
For the rest of this guide, I’m going to run with the most common clipper/easiest-to-understand clipper setup, which is:
- Fade blade clipper
- Clipper closed cuts to 0mm.
- Clipper open cuts to 1.5mm
I’m going to briefly run you through how these work together as well as blend into each other.
You need to know so you have a better idea of when we fade (later on in this article.)
This is how they work …
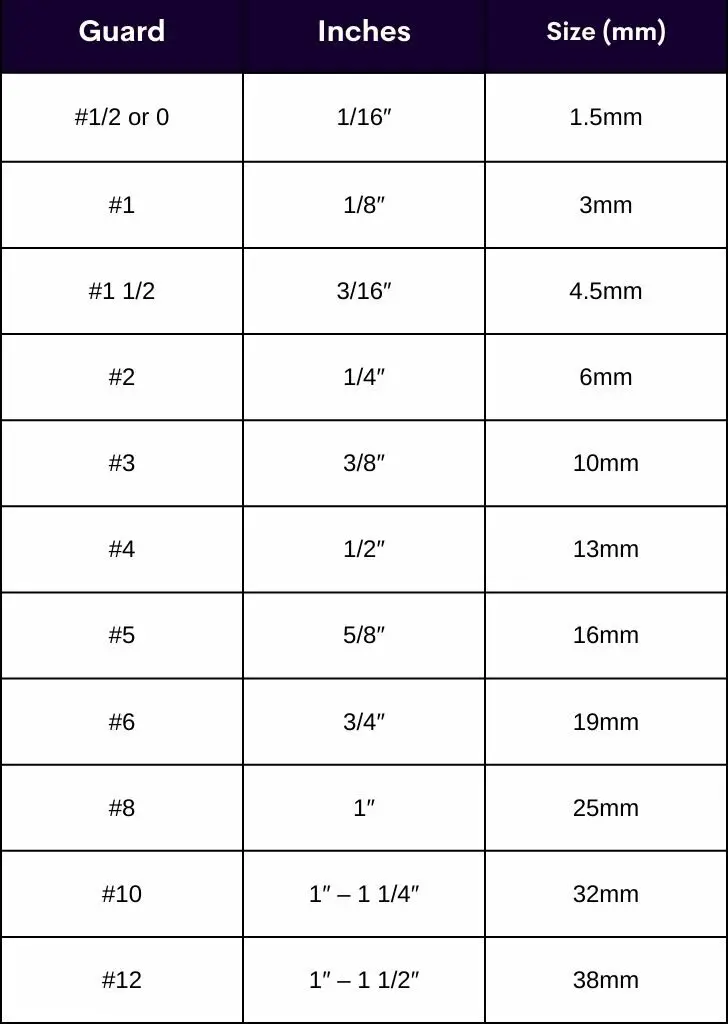
If you had a #1 guard (3mm) with the lever closed (0mm) it will cut to that exact length of hair which is 3mm.
But if you had a 1 guard (3mm) with the clipper lever open (1.5mm), it now moves up to become 1 ½ = 4.5mm.
Then if you were to pop on the actual 1 ½ guard (4.5mm) and close the clipper lever (0mm) then you have the true cutting length of the guard which is 1 ½ (4.5mm).
And again, if you had a 1 ½ guard (4.5mm), and you open up the lever (1.5mm) it becomes a #2 guard (6mm).
Put on the actual #2 guard(6mm) lever closed it will cut to that length and if you then open up the lever + (1.5mm), then you’ve created a 2 ½ guard (7.5mm).
After this point.. the intricacies don’t matter too much…
But can you see how each guard can slowly blend into each other depending on how you move the clipper lever?
And it doesn’t matter which guard you have, as long as you know the guard and your blade cutting length, you can always figure out what guards you need to reach a certain cutting for example:
This gives you an overall cutting length of 4.5mm which, is basically a 1 ½ guard.
You could start at the 4.5mm of hair level and as you go down towards the 3mm guard level, slowly be closing your lever bit by bit so that by the time you reach the bottom of the 3mm level, you’d have blended the two lines together.
Fading is just doing this process in a structured manner.
If you want to fade, you need to know how the levels and a clipper guard work to transition into each other.
Now I’ll show you how blending from # 2guard guideline 6mm in hair length all the way down to a zero (0 mm of hair would work). 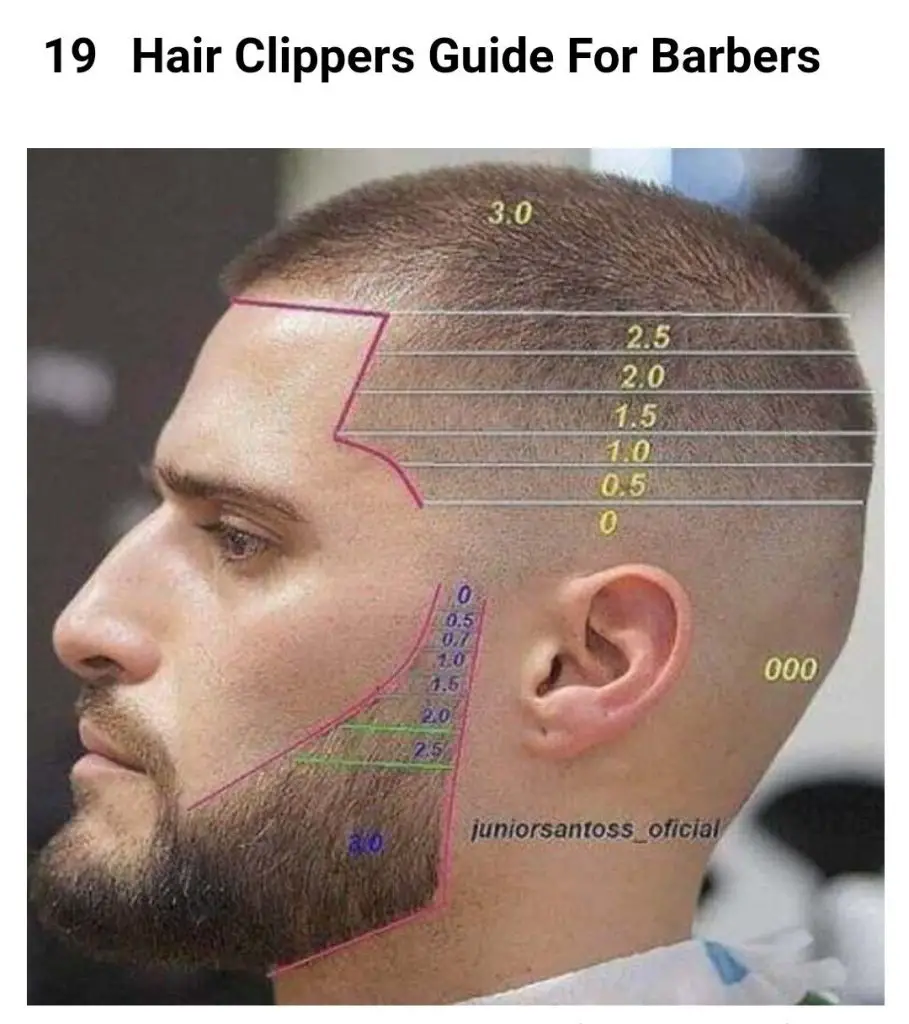
And…
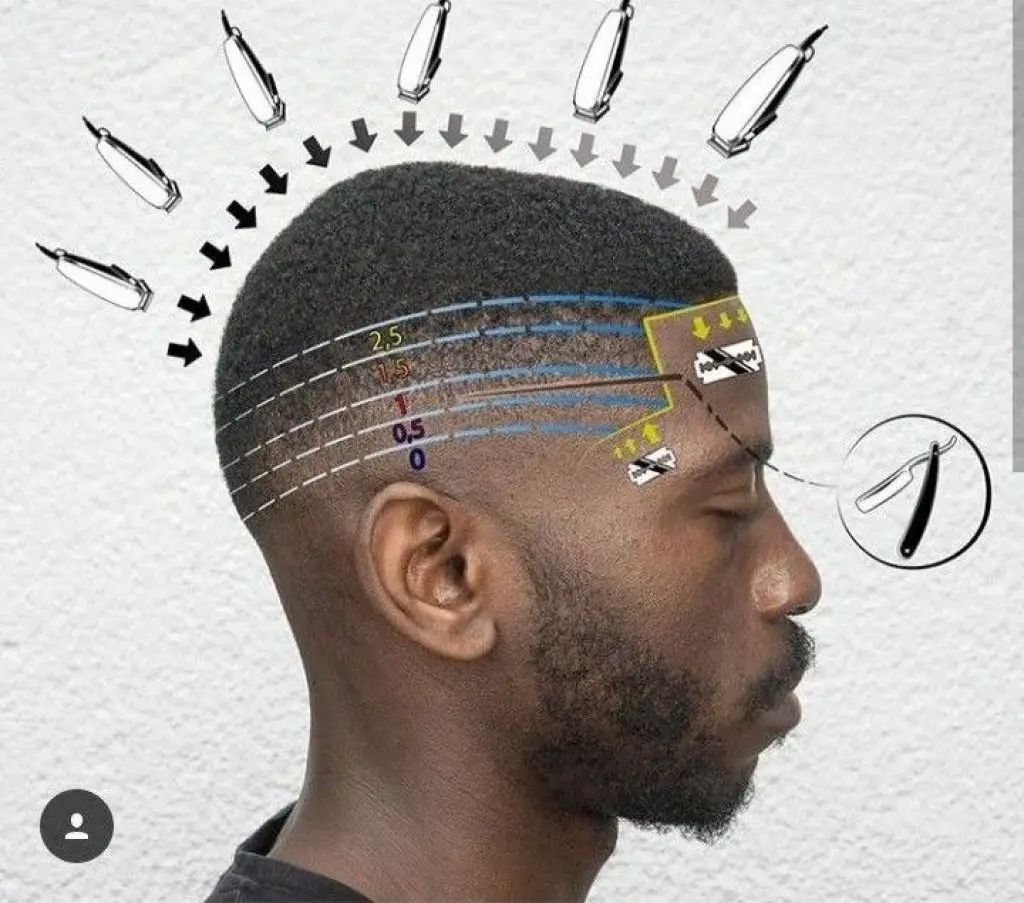
But first, what exactly is a guideline?
What’s a guideline? We talk about this next.
Guidelines
These are guidelines.
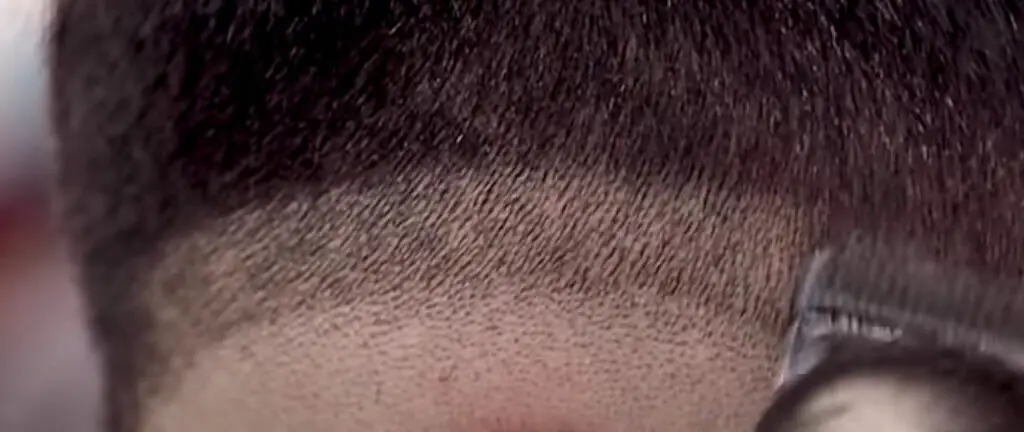
A guideline is an obvious/harsh line created between different lengths of hair.
They are created when the length you clipper currently cutting, leaves more hair than the previous length below.
See how they steadily go up and each guideline gets thicker?
With guidelines, they are about an inch long (but that depends on the style), but the more space you make, the better the blend.
Starting bigger overall and longer cutting length, as you close your lever, you will gradually cut more hair, essentially creating a fade.
While doing so, you should be taking out the guideline(fading it away), until you reach the bottom which will be the start of the new guideline. (I’ll show you this later)
When you set guidelines you go up to leave my hair and make the guideline, then you put on the right guard and lever setting to take it out and blend. 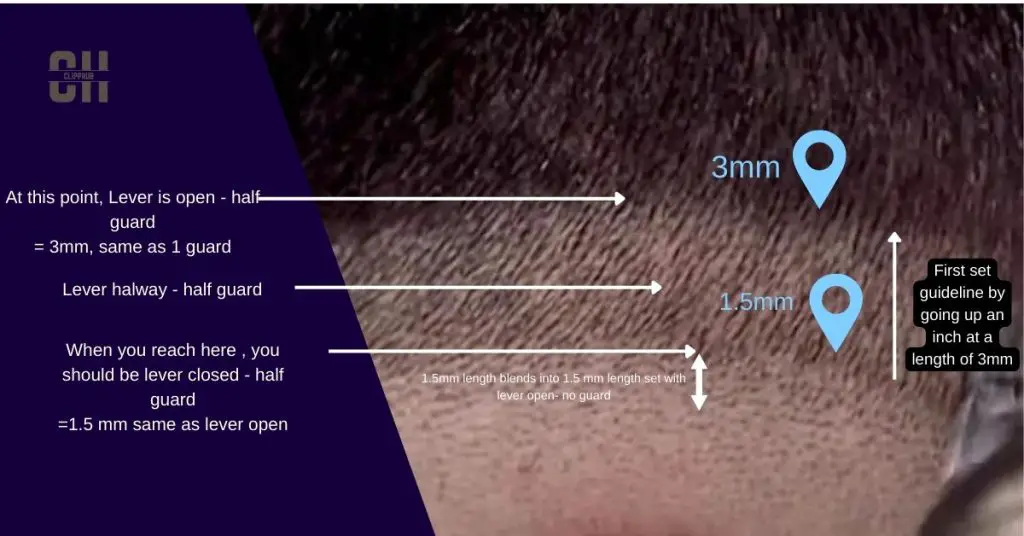
I go more into detail on creating lines and fully fading them in my guide on how to fade for beginners at home.
In this guide, I’ll just break down the process of fading with guidelines already created.
(The actual fading itself)
So with that said, let’s get into how you can fade at home.
BLEND FADE LINES
If you are to fade from a #2 guard (6mm) to a 0 this is how you do it.
Below I’ll explain in detail and show how your current cutting meets the next guideline below (which is the best way to fade.)
In these, I’ll mention flicking which is when your lever is halfway and you’re looking to take out hair at the middle of the guideline.
I won’t tell you the exact length you cutting to as :
- It gets confusing
- There’s no exact length and it depends on where the middle is for you.
But just aim to have as in the middle as you possibly can.
Now, as you fade you should also be brushing the hair down to get a better idea of how your hair looks as you fade.
For this process, I’ll be working down from the longest length of hair to minimize error.
Now let’s start from the top…
And here is where you’ll meet at the 1 ½ (4mm) guideline
Then if you pop on your 1 guard(3mm) lever open (1.5), start at the 1 ½ (4mm)guard line.
Turn the lever halfway and flick off the middle of this guideline
Then with the 1 guard (3mm) lever closed (0mm) your clippers now cut true to the 1 guard (3mm).
And that’s when you’ll meet the 1 (3mm) guard guideline

Then if you pop on your ½ guard/ 0 guard (1.5mm) with the lever open (1.5mm) and start on the 1 guard(3mm) guideline.
Turn your clipper lever halfway and flick at the middle of this guideline.
Then with ½ guard(1.5mm) lever closed (0mm) it will cut true to that length.
And that’s where you meet the ½(1.5mm) guard guideline
Now at this guideline, you set with your clipper lever open and no guards.
So from here, you can take your clippers with no but the lever and slowly close them as you move down this guideline.
Then it’ll get to a point where you’ll:
Meet the 0 guideline
This a flat-out zero and it’s the guideline you made with your trimmers.
So, with your clippers fully closed, and no guard, take out that final guideline.
Just like that you successfully blended from the #2 guard length of hair, all the down to a 0.
And that’s how you’d blend fade lines.
You can have a much bigger distance between the top and bottom of the blend, you can make it longer or shorter depending on the guess too.
But overall, you now have the clippers to skills fade.
Now you just need to line up your cut.
If you’re looking to your fade game to the next level, check out our article on how to fade clippers for smoother, hassle-free fading.
Conclusion
In this article, we went over how to blend fade lines.
To blend a fade line, it takes good control of your clippers, and good guard to guideline understanding.
If you found this article helpful, check out other articles below on this topic.


